Creating and assigning Access Policies
Follow these steps to create an Access Policy via the Console:- Go to the desired Data Pool.
- Open the “Access Policies” tab.
- Click “Add new policy”.
- Define column and row access controls.
- Assign Applications to the Policy.
- Name and describe the policy.
- Review and click “Create”.
- Enable Access Control on the Data Pool.
Column-level rules
Column-level rules define which specific columns of a Data Pool are accessible.- Console
- API
- Terraform

Column-level rule configuration in the Console
"*":
- Console
- API
- Terraform

Configuring access to all columns
Row-level rules
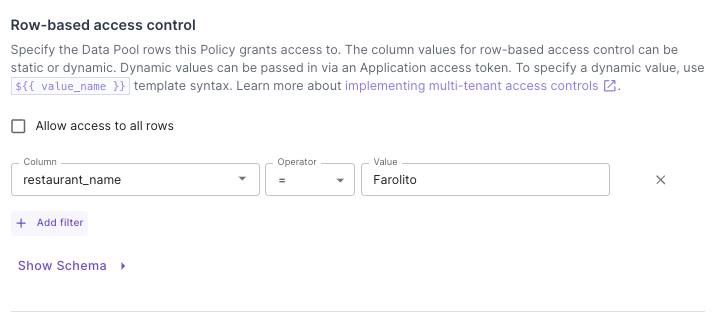
Row-level rules determine which specific rows of a Data Pool are accessible.- Console
- API
- Terraform

Row-level rule configuration
Dynamic values row-level rules
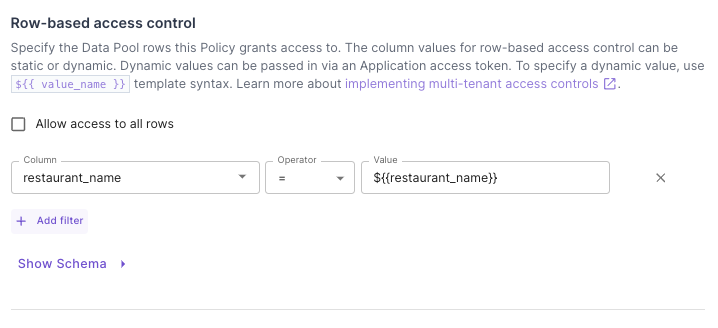
For more flexible policies, you can use dynamic values from the JWT token in row-level rules:- Console
- API
- Terraform

Dynamic row-level rule configuration
Assigning Access Policies to Applications
Access Policies are assigned to Applications to enforce data access controls.
Access Policy Relationships
- A Data Pool can have multiple Policies
- Each Policy can be assigned to multiple Applications
- An Application can have at most one Policy per Data Pool

