Real-time updates
Real-time updates allow you to update existing rows in a table, which are immediately reflected when querying.Use cases
- Update rows in a table and query their most recent state
- Update slowly changing dimensions
- Update entity tables (users, accounts, etc)
How it works
Real-time updates are supported by ClickHouse’s ReplacingMergeTree table engine. This table engine replaces rows that share the same sorting key, keeping only the most recently inserted row (or the row with the largest “ver” column value). De-duplication happens at query time and asynchronously, through background merges. For those familiar with ClickHouse, Propel automatically includes the “FINAL” modifier on queries to ReplacingMergeTree tables. However, it’s important to note that there are two implications:- The row count in ReplacingMergeTree tables may be larger than the logical number of rows. This is because there may be duplicate rows in the table that haven’t been merged yet. These rows will be de-duplicated at query time.
- De-duplicating records at query time can have a performance impact on very large tables. This can be compensated for by using a large Propeller.
Create a Data Pool to handle real-time updates
In this section, we will guide you through the process of creating a Data Pool that can handle real-time updates. We will provide step-by-step instructions on how to create it via the Console, API, and Terraform.- Console
- API
- Terraform
To create a Data Pool that can handle real-time updates in Console, first go to the “Data Pools” section, then click “Create Data Pool”.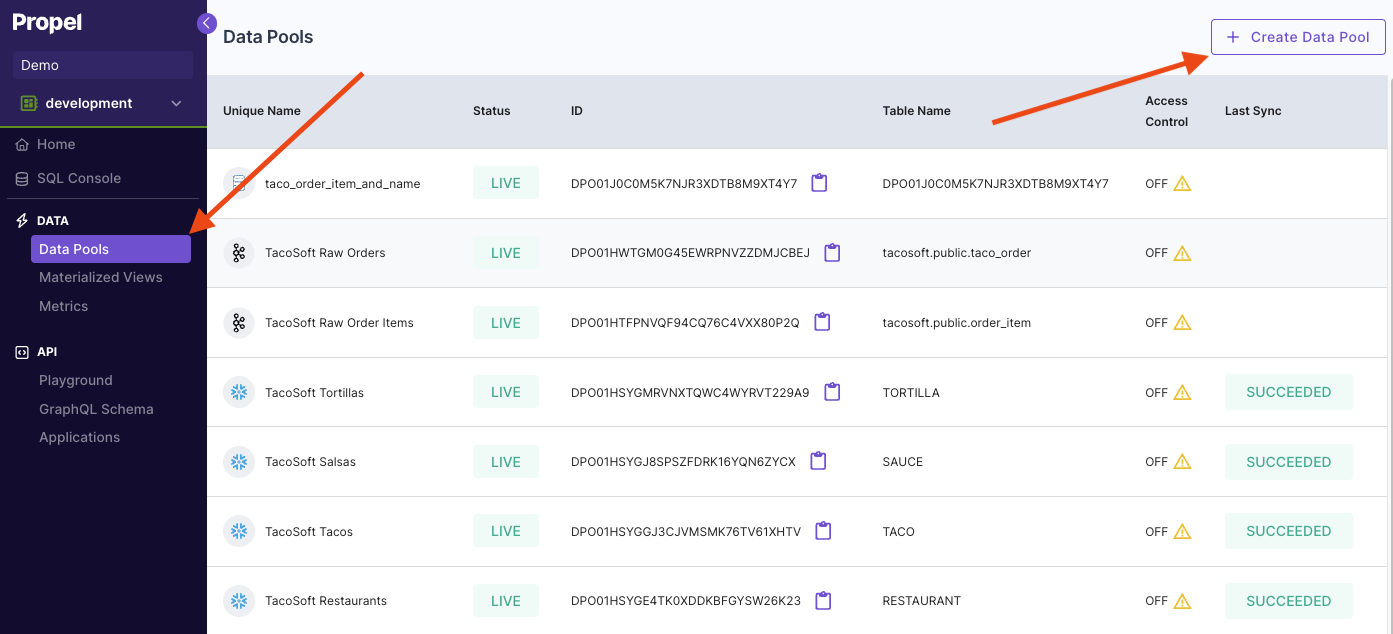 Select the Data Pool type you need to create.
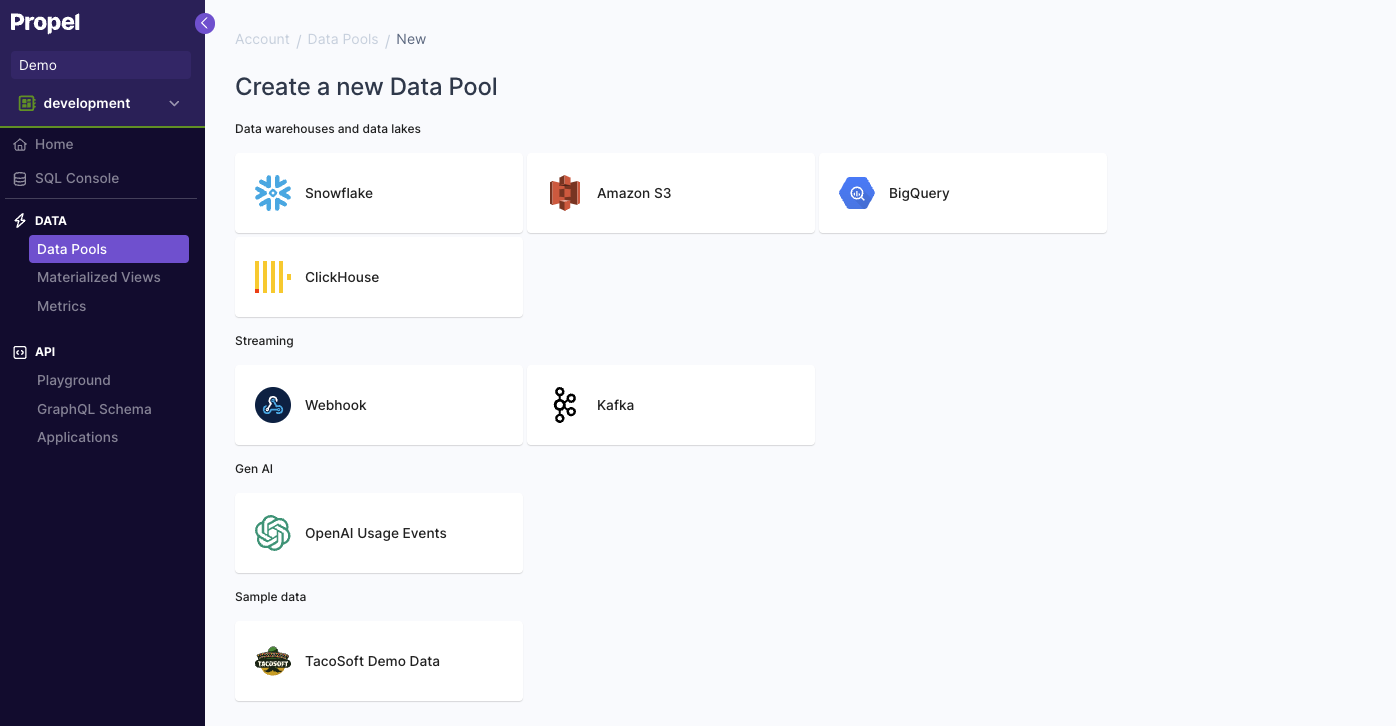 In the “Table Settings” step, select “Mutable Data”.
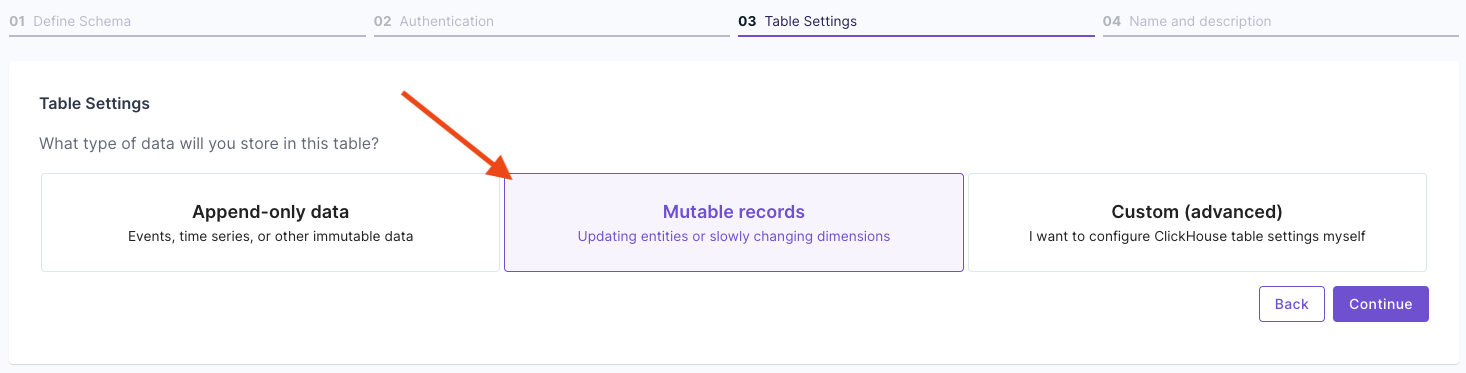 Answer the questions on how to uniquely identify records and your query patterns. For more information, read the “Mutable records” section of the How to select a table engine and sorting key guide.
 Next, you will get the suggested table settings. Note that the table engine is ReplacingMergeTree, and the sorting key determines the uniqueness of the row.
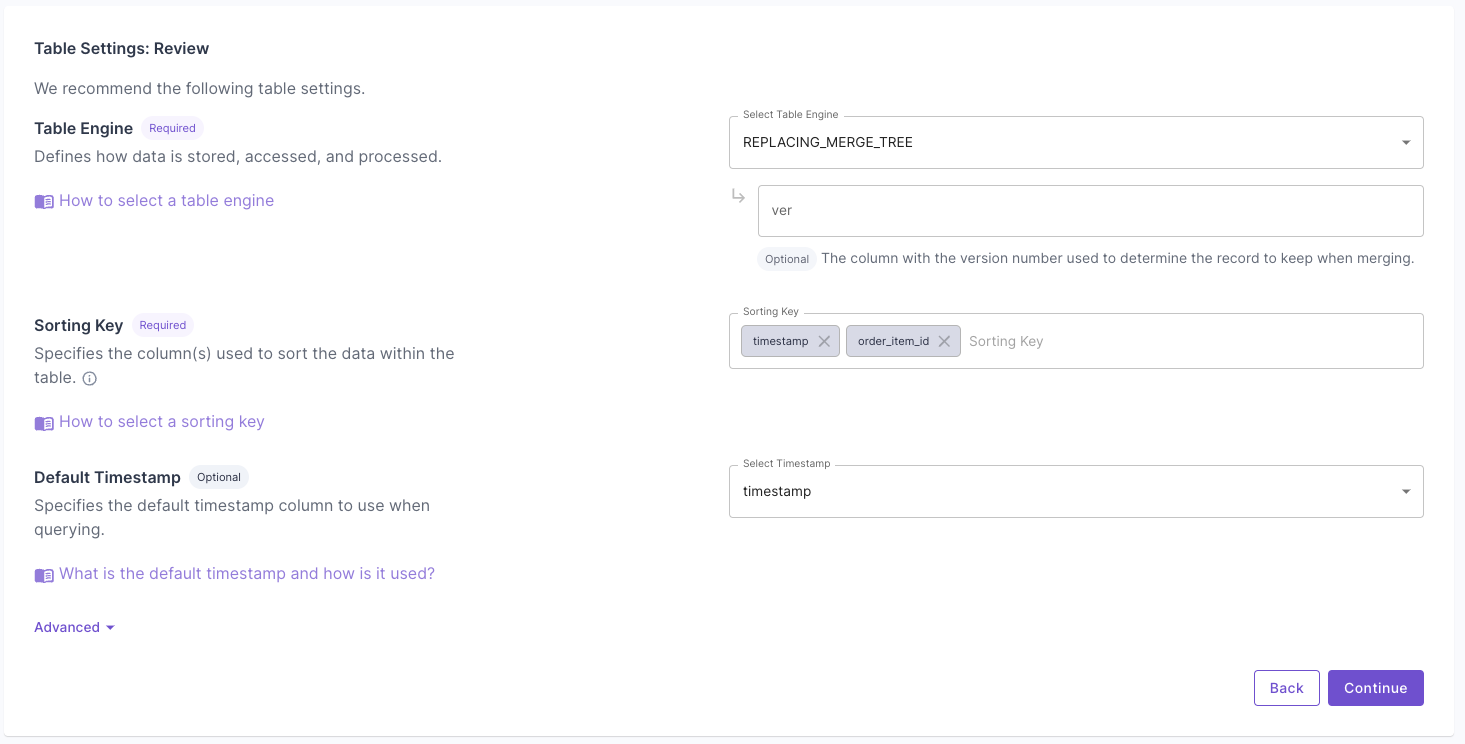 Click “Next” to finish setting up the Data Pool. Once it is created, you can go to the “Details” tab and verify the settings.
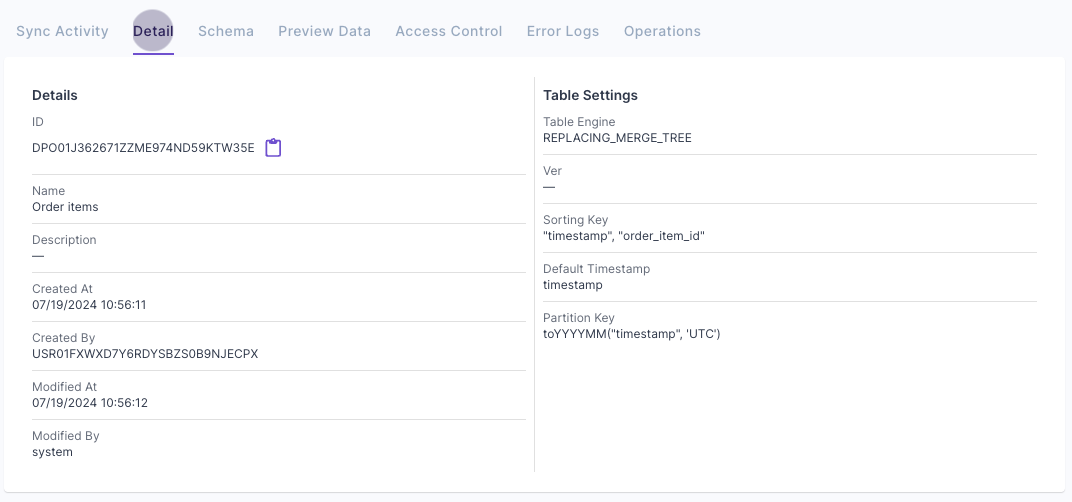
Create a Materialized View to handle real-time updates
In this section, we will guide you through the process of creating a Materialized View that can handle real-time updates. We will provide step-by-step instructions on how to create it via the Console, API, and Terraform.- Console
- API
- Terraform
To create a Materialized View that can handle real-time updates in the Console, first go to the “Materialized View” section and click “Create new Materialized View”.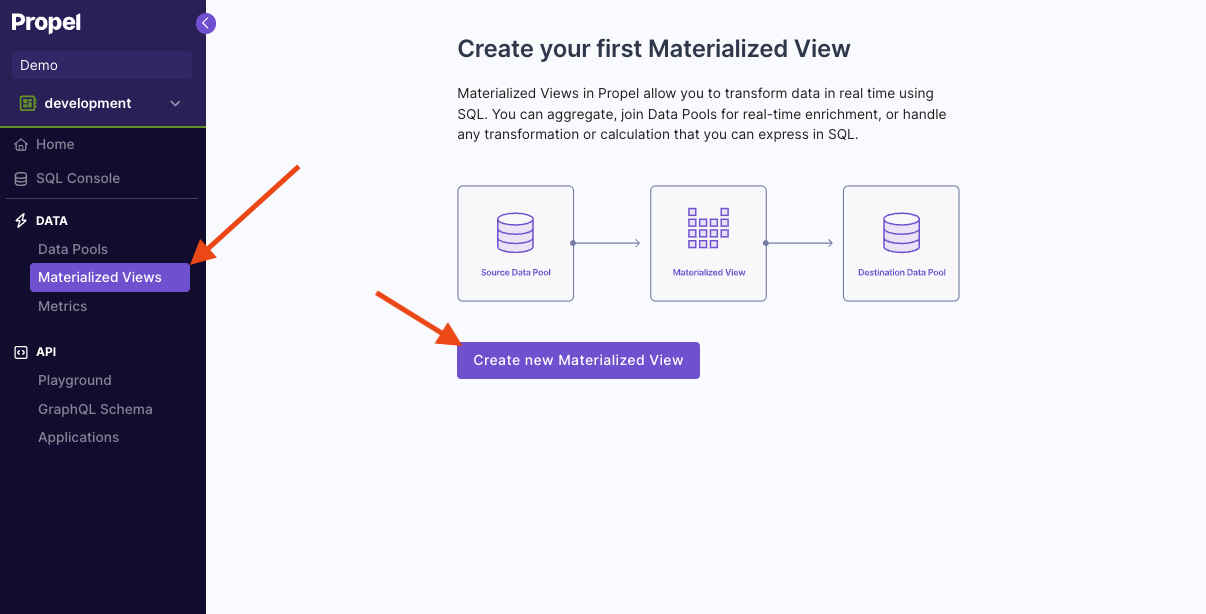 Then, enter the query that defines the Materialized View. For this example, we are going to duplicate rows from the “TacoSoft Demo Data” table, so we just need to select all records.
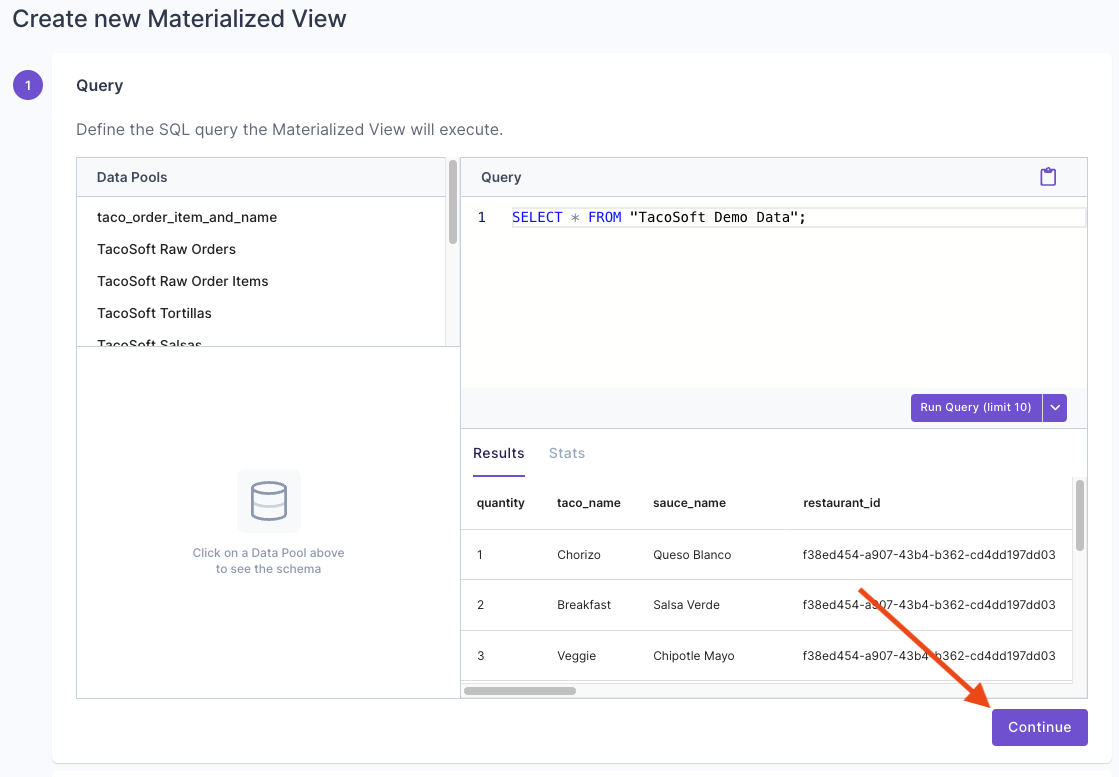 Select “New Data Pool”.
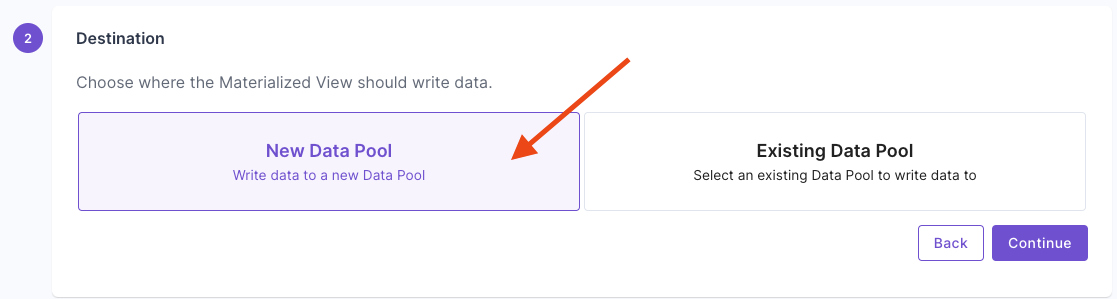 Give your destination Data Pool a name and description.
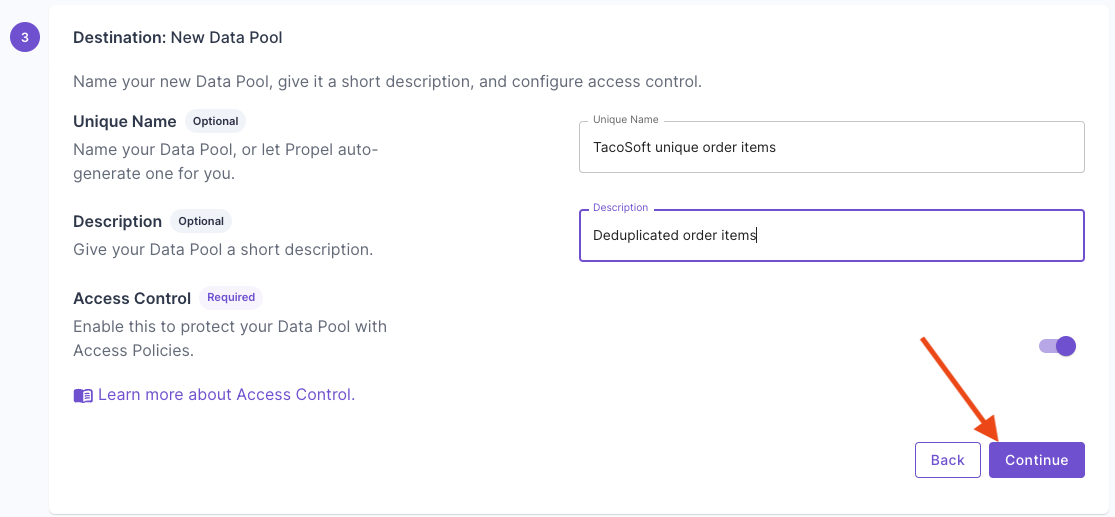 Select “Mutable records”, then click “Continue”.
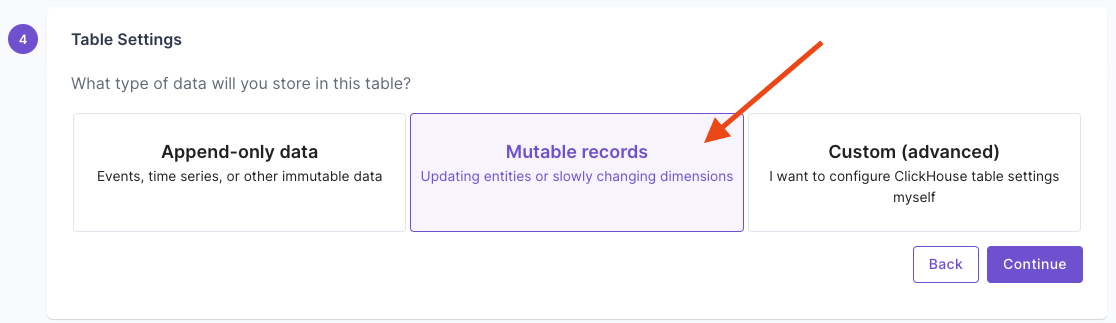 Answer the questions on how to uniquely identify records and your query patterns. For more information, read the “Mutable records” section of the How to select a table engine and sorting key guide.
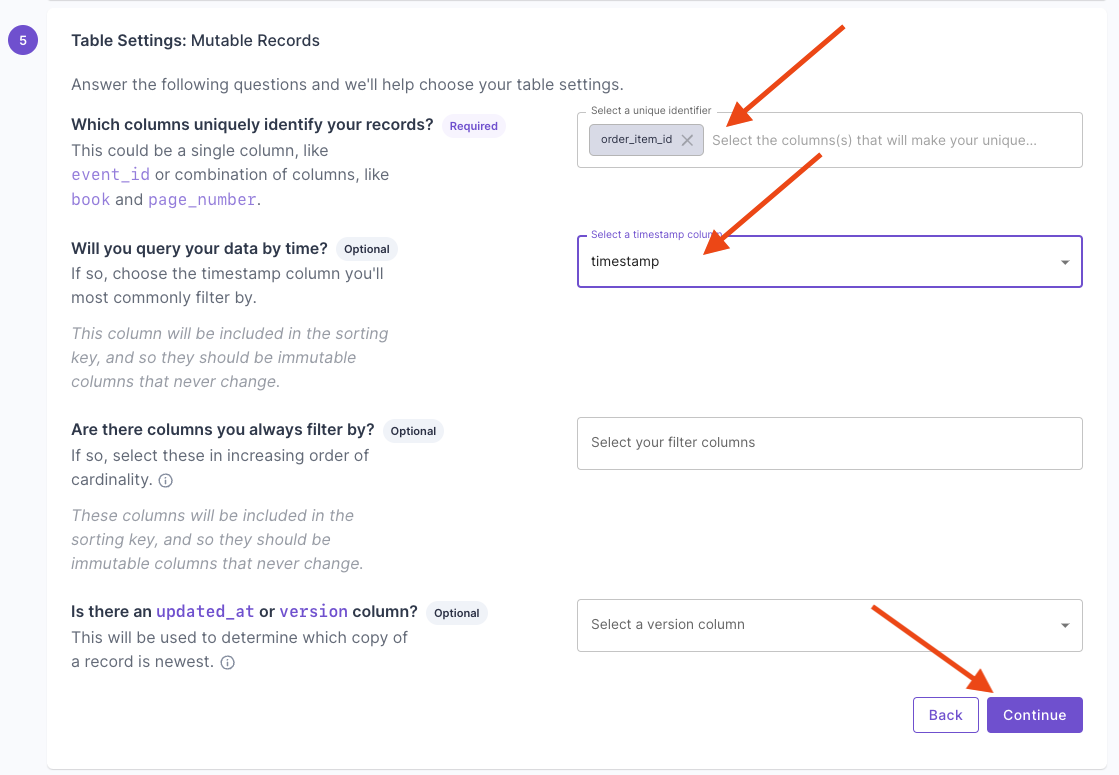 Next, you will get the suggested table settings. Note that the table engine is ReplacingMergeTree, and the sorting key determines the uniqueness of the row.
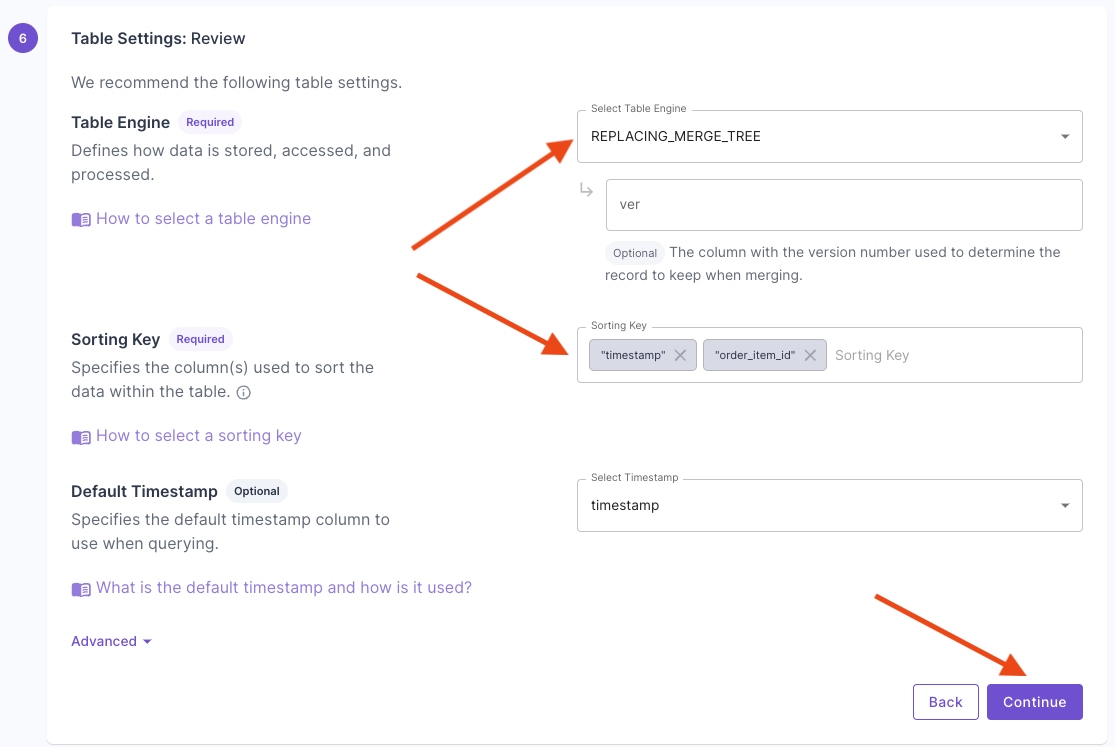 Click “Continue” to finish setting up the Materialized View.Once you complete setting up the Materialized View, you will have a Data Pool with the de-duplicated records.
Batch updates
Batch updates are useful for one-off or automated jobs where you need to update many rows in a table. You can perform a batch update using the Console or thecreateUpdateDataPoolRecordsJob API.
Use cases
- Backfill columns
- Update column(s) for all table rows
- Update column(s) for table rows matching a filter
- Redact columns on specific rows
How it works
Batch updates in Propel are supported by table mutations in ClickHouse. When you perform a batch update, Propel issues anALTER TABLE … UPDATE statement to ClickHouse and monitors its progress. The mutation proceeds part-by-part, partition-by-partition, updating rows in the table.
Create a batch update job
There are two parts to the update job. First, the list of filters that will be used for updating records. Records matching these filters will be updated. Second, the columns and values to be updated. The value can be:- Other column names. For example,
sauce_name. - A string in single quotes. For example,
'al pastor'. - A number. For example:
10. - A JSON property. For example:
order.id. - An expression. For example:
total_price * quantityorCONCAT(taco_name, '🌮').
To update a column to a string value, you must wrap the value in single quotes
‘al pastor’ .- Console
- API
To initiate a batch update job in the Console, navigate to the Data Pool from which you need to update data, click on the “Operations” tab, and then click “Update data”.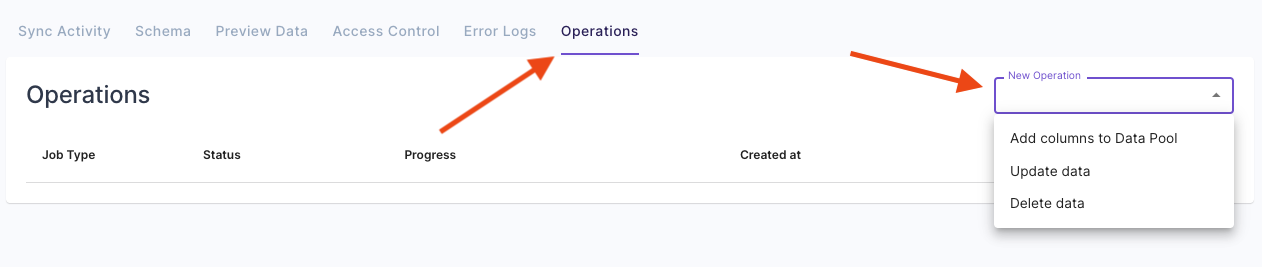 Here, you can specify the filters of the data to update and set the values to update.
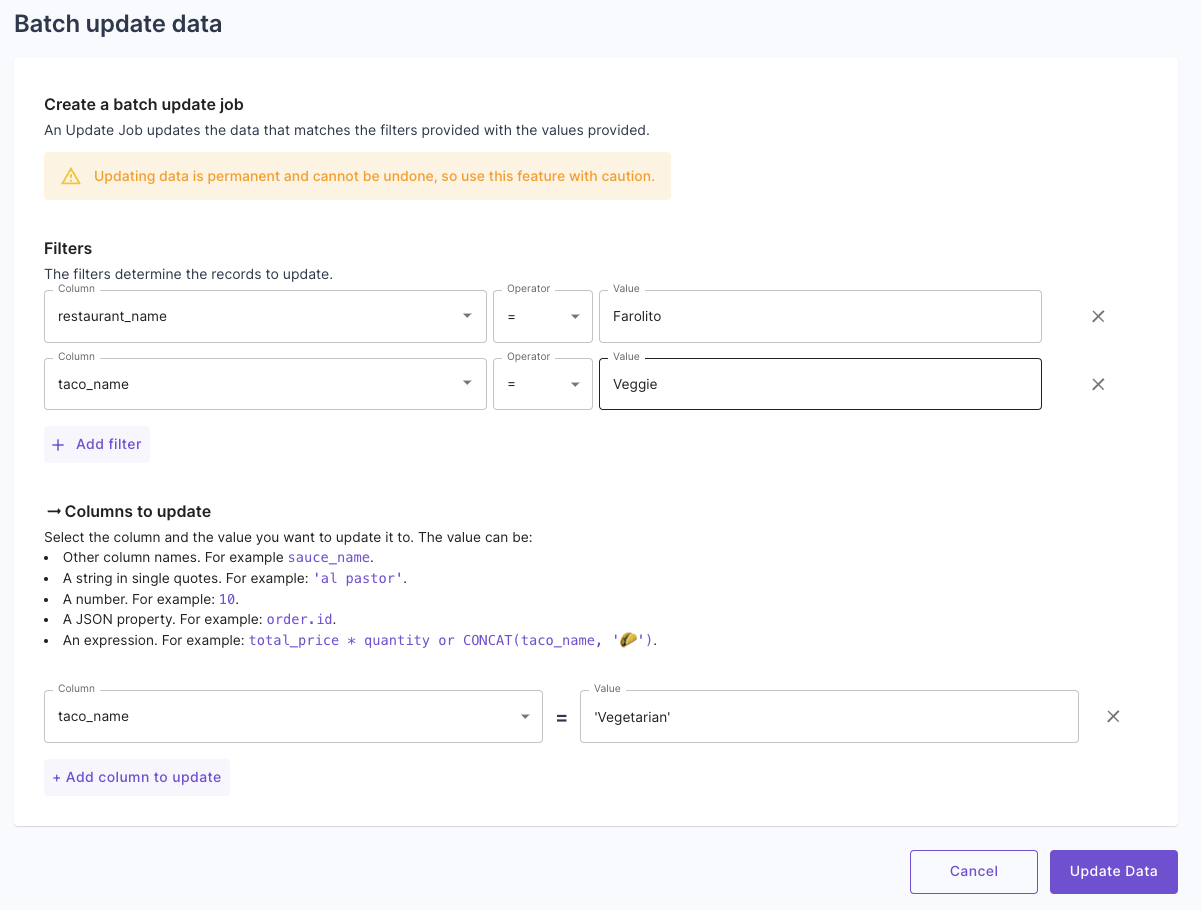 Lastly, you can see the progress of the updates job and when it is completed.
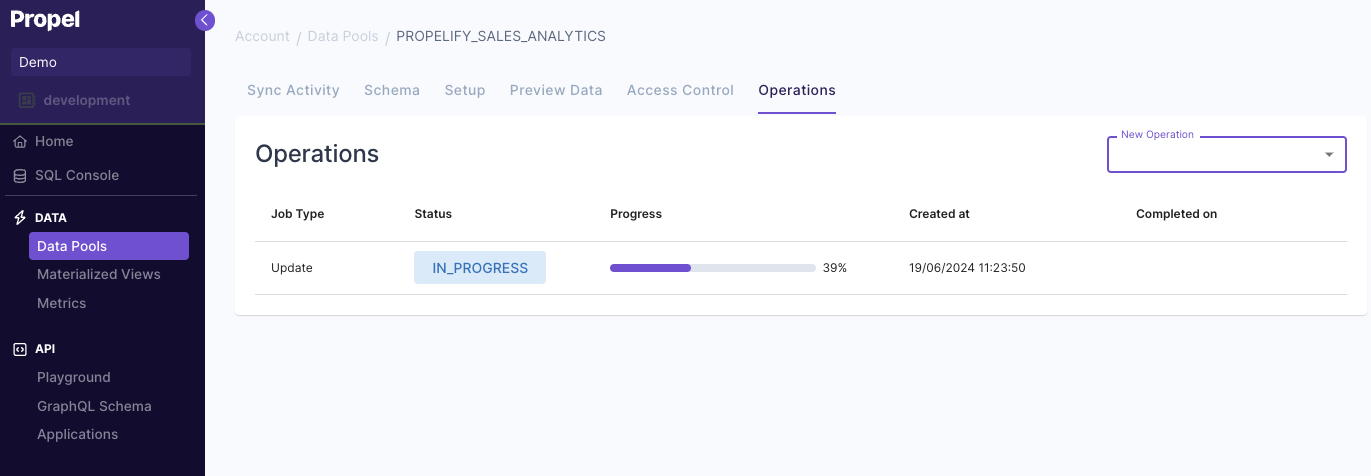
Notes on updating non-nullable columns:
- Suppose we have a non-nullable column A and a nullable column B. We execute an update setting
A = B + 1. The operation yields null if the job encounters a record where B is null. This will result in an error when attempting to assign it to A, since A cannot be null. Consequently, the job fails, and the remaining records remain unchanged, while the records processed before encountering the null value are updated. - If the column being updated has a different data type than that of the update expression, the result will be null. This could cause a similar error as the previous example if the column is non-nullable.