Amazon Relational Database Service (Amazon RDS) is a popular option for storing data, since you can use it to easily set up, operate, and scale multiple databases in the cloud. When you need to improve the readiness of the data and perform analytics, though, you'll need to move it to a data warehouse for processing.
One solution is to use Snowflake, a software-as-a-service (SaaS) platform that can quickly and flexibly process all types of data, from unstructured to streaming.
Why a data warehouse?
A data warehouse creates a central repository of information that can be used in analyzing your data. This is helpful for multiple use cases, including the following:
- Customer sales data: Analyzing customer sales data helps you to get insights into your customers, such as their average purchase amount, their lifetime value, or their level of satisfaction, so that you can improve your sales results.
- Retail transactions: Retail transaction analysis can enable you to project revenue and calculate profits, allowing you to be more selective in your marketing efforts. You can then maximize the returns on your marketing investment.
- Log data: You can analyze batch or streaming log data generated by your applications, network traffic, or access logs. This is helpful if, for example, you must meet regulatory requirements to keep logs. The analysis can help you identify your most active users, the most common actions performed, and any possible threats, giving you visibility into your entire ecosystem.
How Does Snowflake Work?
Snowflake is a data platform provided as a cloud service. This means that you have no hardware or software to manage, because Snowflake handles maintenance, management, and upgrades. It also meets regulatory compliance to ensure data integrity, security, and governance.
Why Use Snowflake?
In addition to its data storage and analysis capabilities, Snowflake offers other benefits:
- It's cloud agnostic, with unlimited, seamless scalability across AWS, GCP, or Microsoft Azure.
- It provides complete ANSI SQL language support.
- It's not built on any existing database technology or big data software platforms such as Hadoop.
To see this in action, you're going to move data from an RDS account into Snowflake.
Prerequisites
You'll need the following for this tutorial:
A PostgreSQL database with the Northwind sample database
Setting Up an Amazon RDS Database
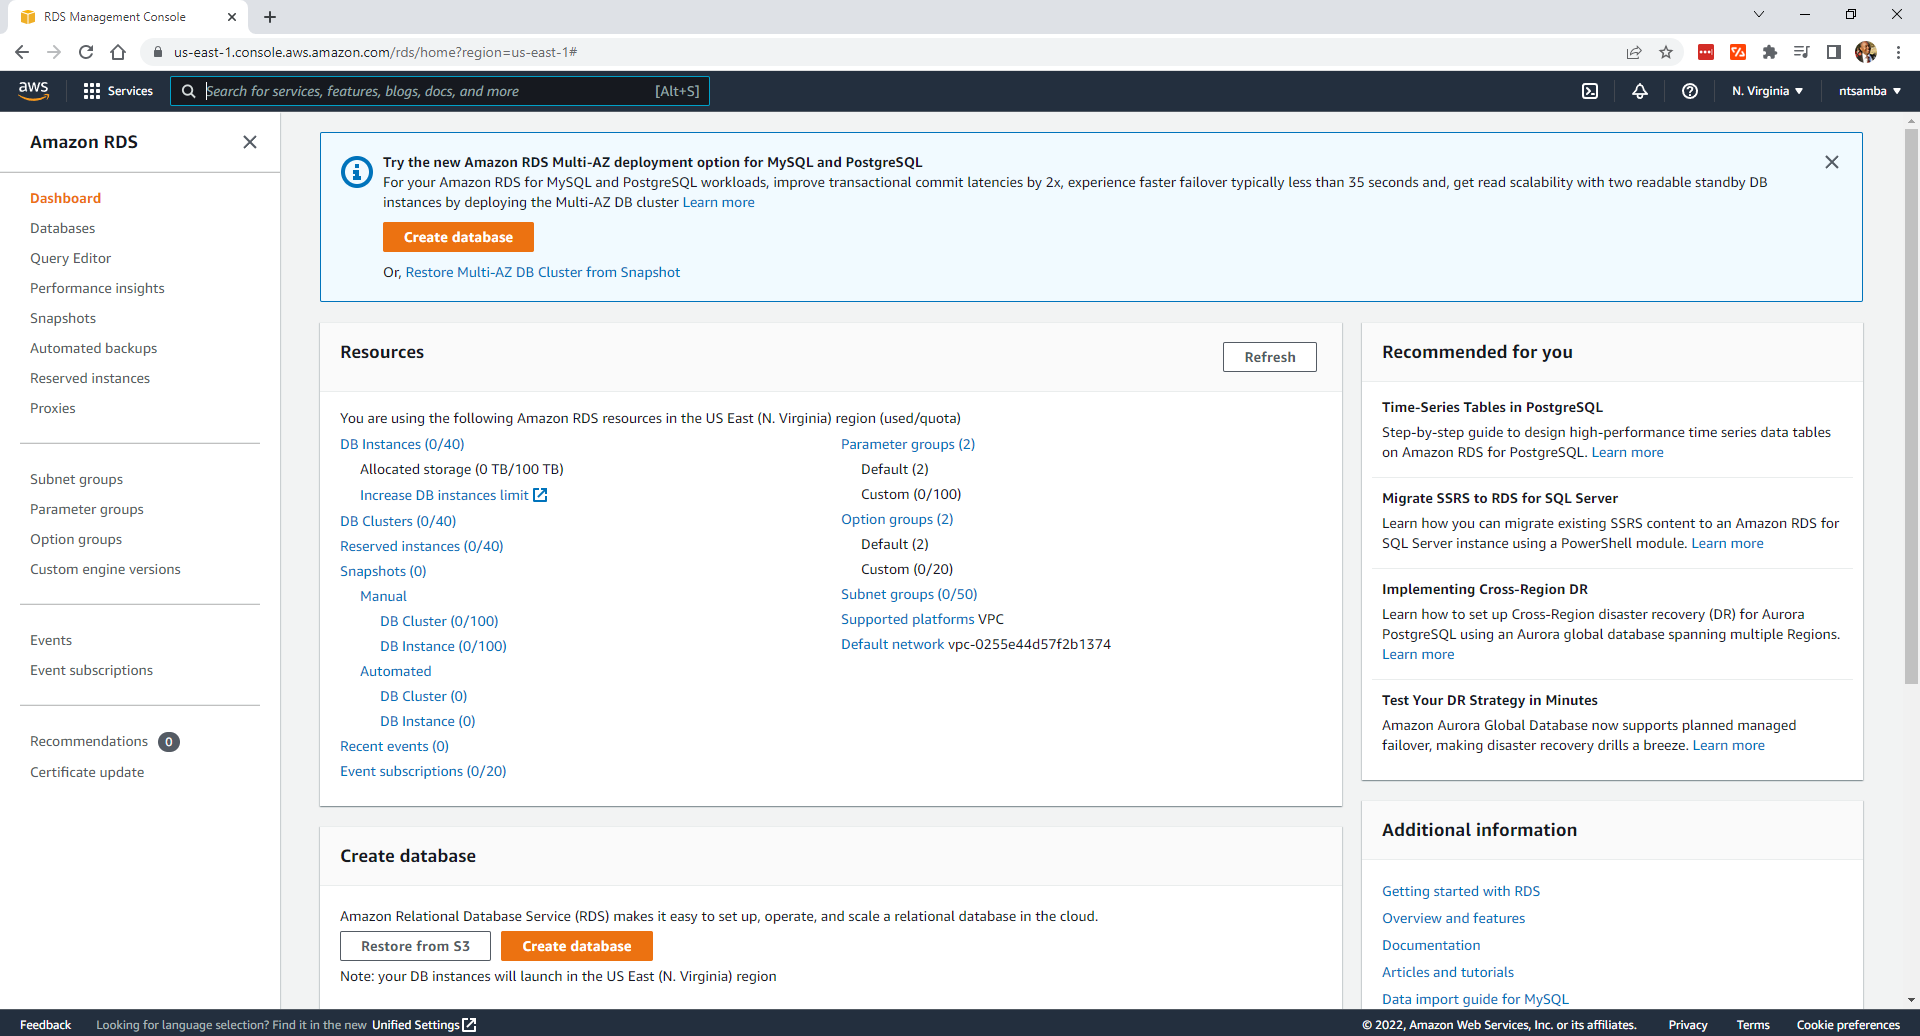
Log in to the Amazon RDS console and click "Create database":
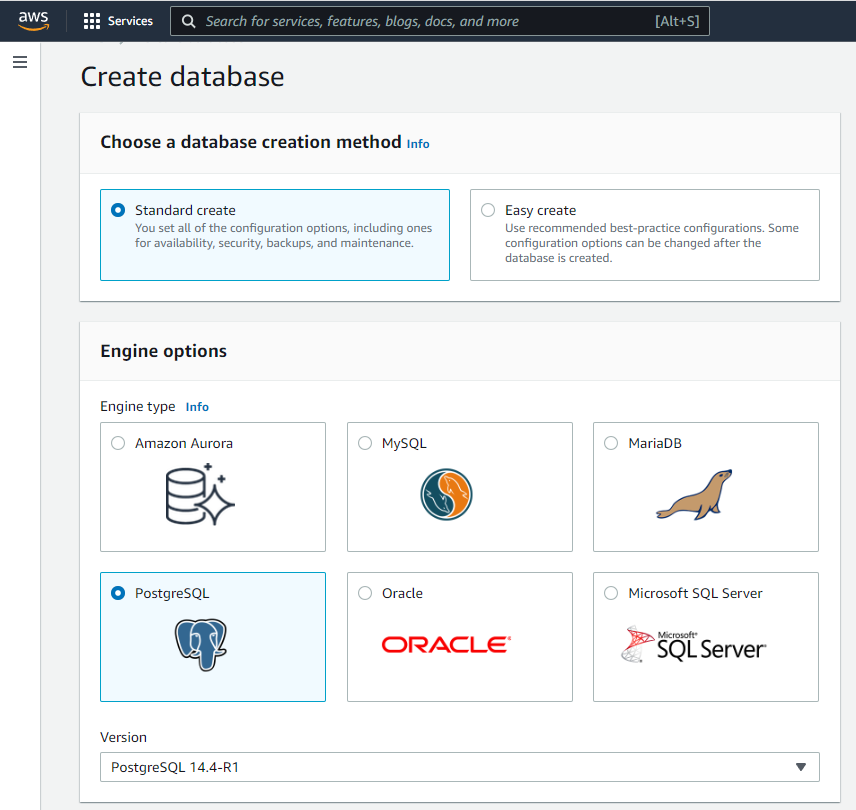
Select the "Standard create" option as the database creation method and "PostgreSQL" as the engine type. Then, select the latest version, which is 14.4-R1 at the time of this article:
Under "Templates", select "Free tier" if you have that option. If not, select "Dev/Test".

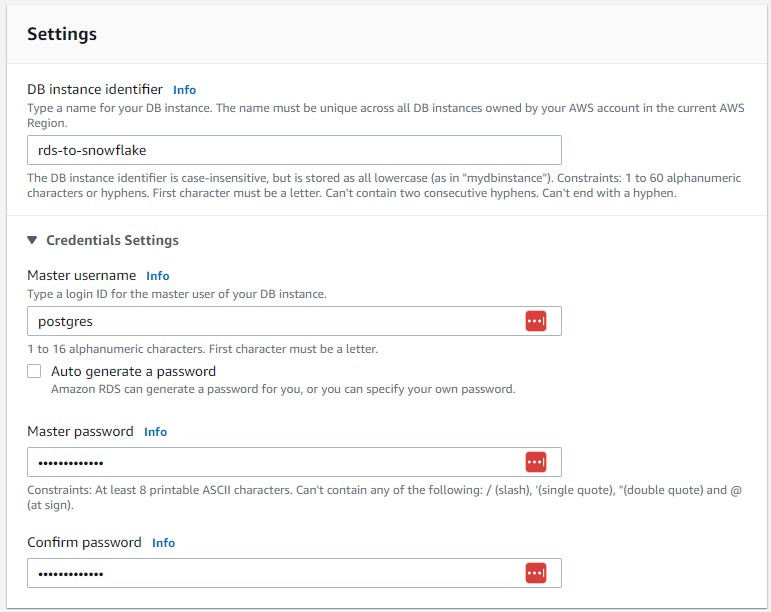
In "Settings", put 'rds-to-snowflake' as the DB instance identifier, keep 'postgres' as the default master username, and set 'RDS-sn0wflake' as the master password. With configuration complete, it will look like this:
Keep everything else as default except "Public access" under the connectivity configurations. Make sure you select "Yes"; otherwise, you'll have to set up Amazon EC2 instances to connect to the database:

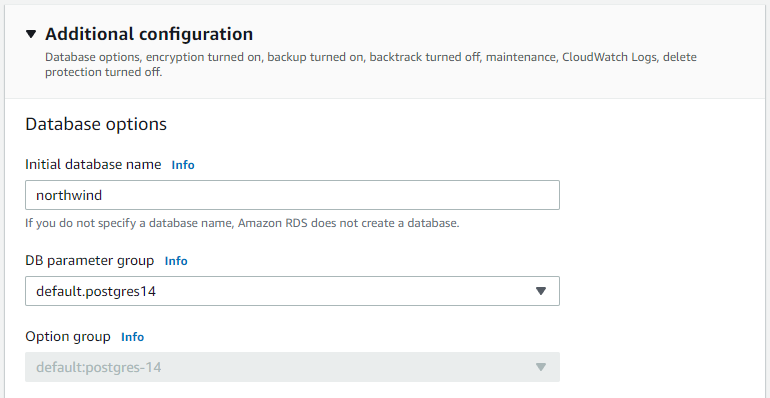
Scroll down to "Additional configuration". You need to specify an initial database name under "Database options" to create the database. Since you'll be using the Northwind sample database, name this database 'northwind':
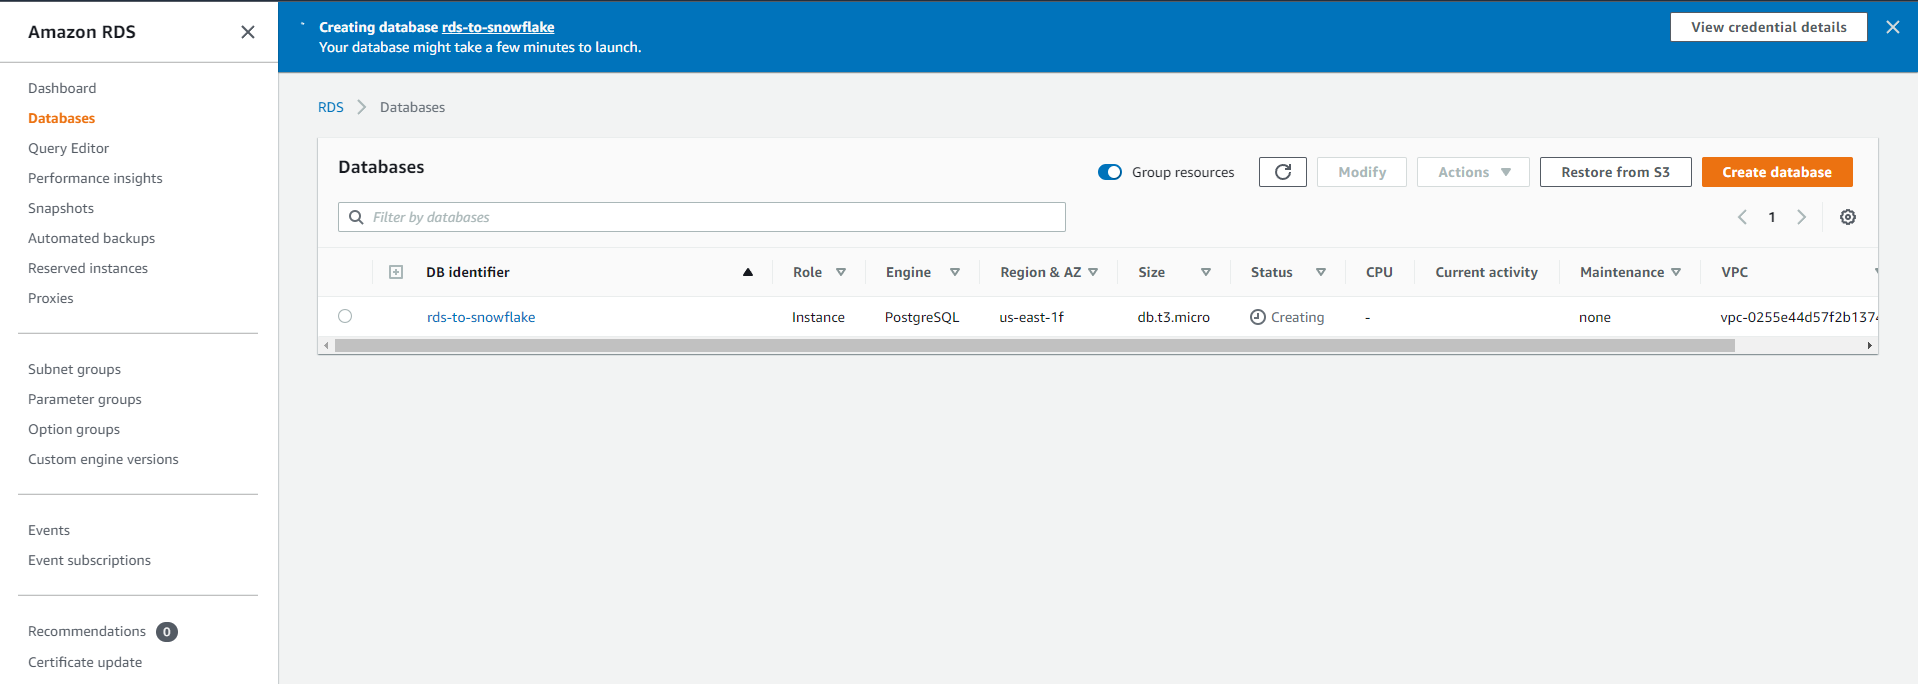
Check your estimated monthly costs to ensure that running this service is within your budget, then click "Create database":

You'll get a confirmation message:
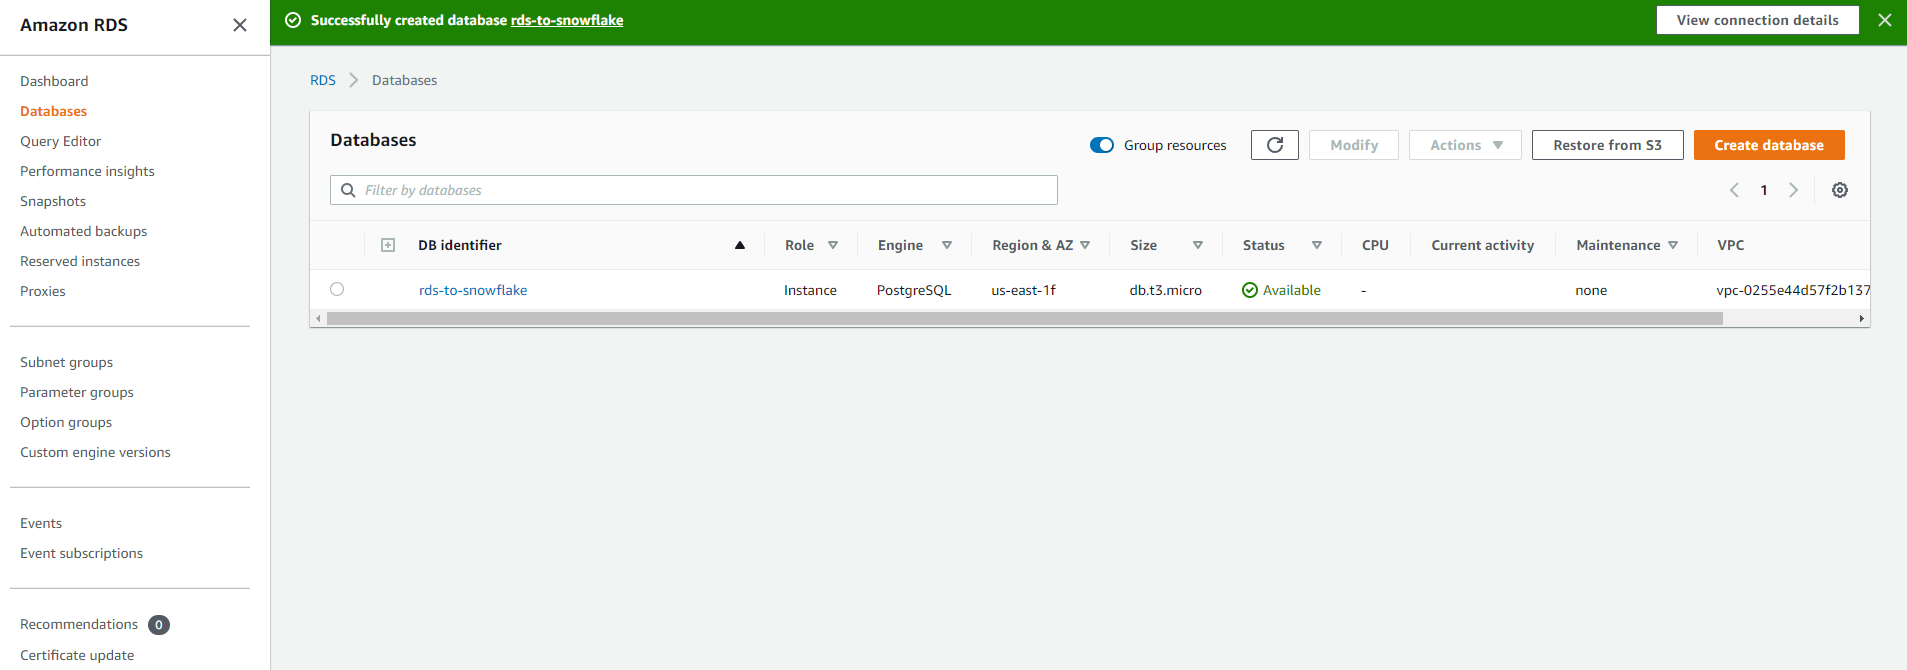
After the database is created, make sure its status is Available so you can connect to the instance:
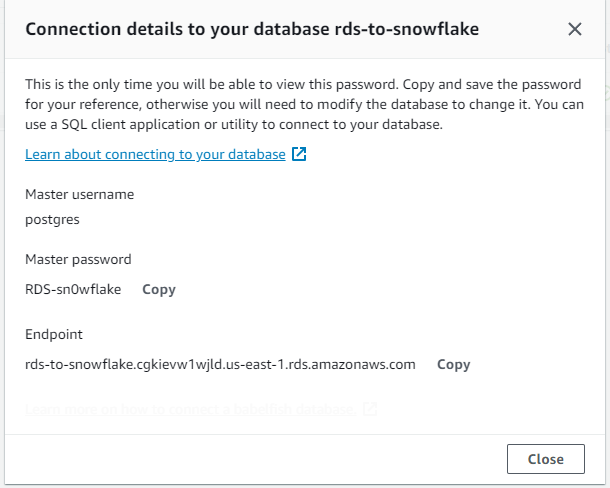
Click the button in the top right corner to view the connection details. Confirm the master username and master password that you set up, and keep the password and endpoint URL in a safe place:
Connecting and Loading Data
With the database set up, you need to connect to it and load your sample data. You'll be using pgAdmin, which is a web-based graphical user interface (GUI) tool that is used to interact with Postgres database sessions locally and with remote servers. Install it and then open it:
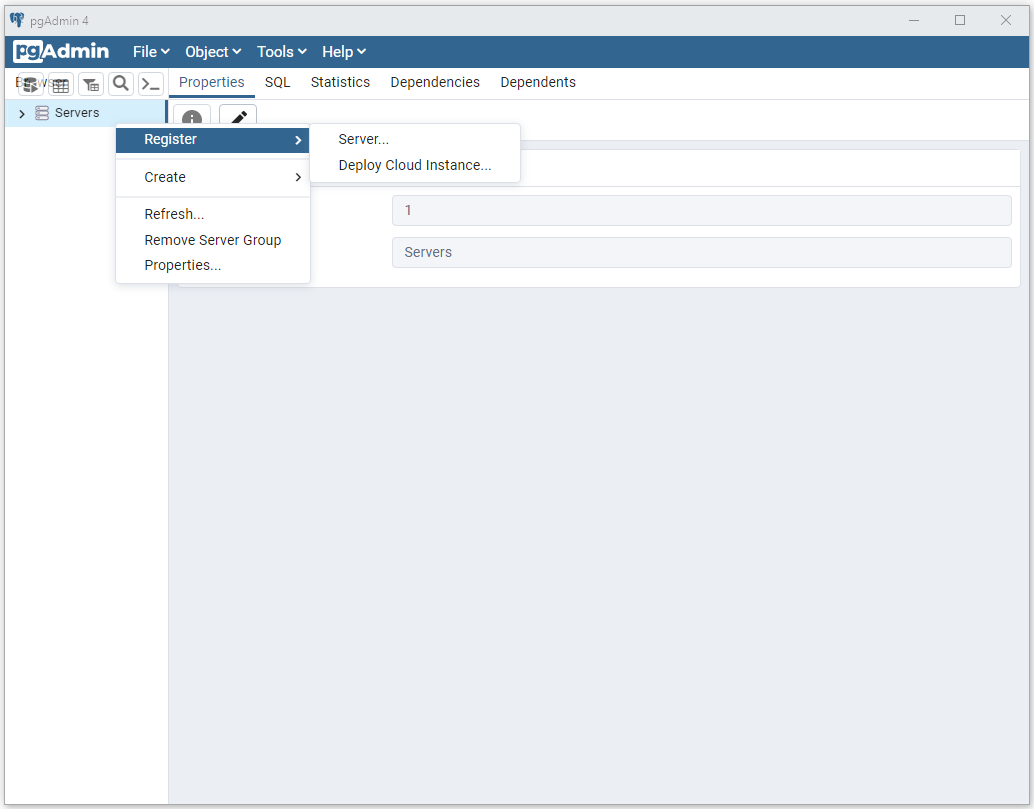
Once it opens up, right-click "Servers" and then select "Register > Server":
Add the name of the server on the "General" tab. This tutorial uses 'RDS-Snowflake':

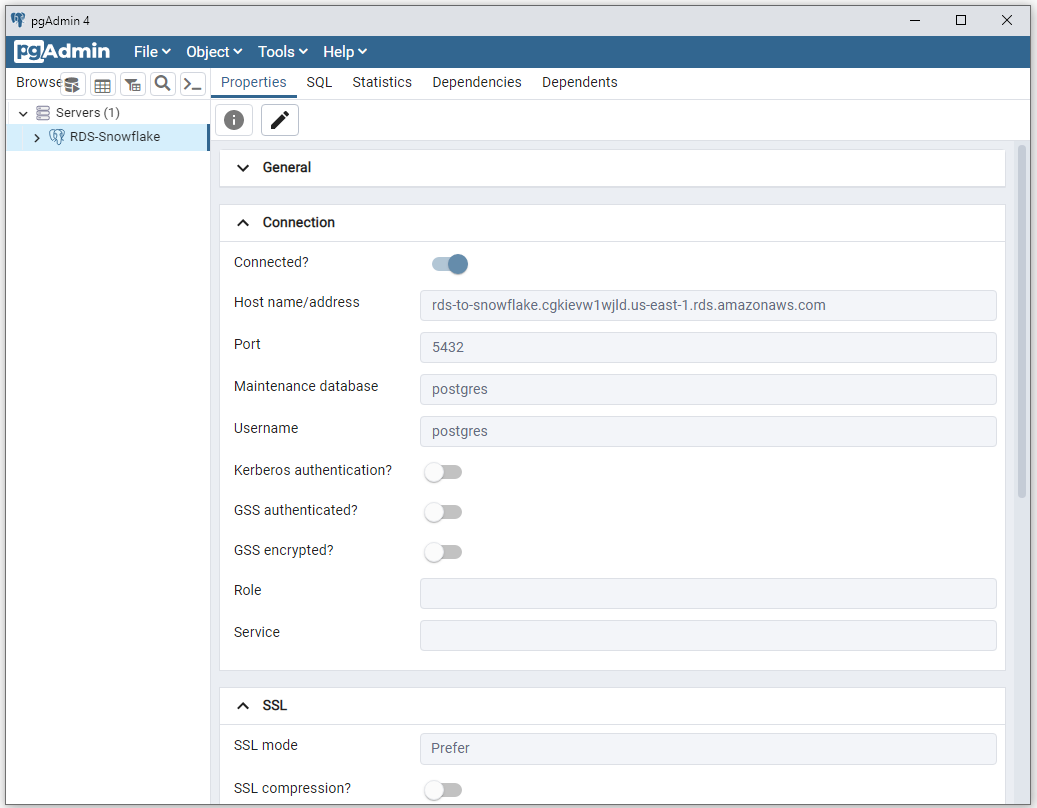
On the "Connection" tab, for the host name/address, put in the endpoint URL that you got when you set up the RDS database. Make sure to put in the correct port and username, and add the password. This configuration looks as follows:

Click "Save". This will save the server details and connect to your RDS Postgres instance. You should now have 'RDS-Snowflake' under Servers:
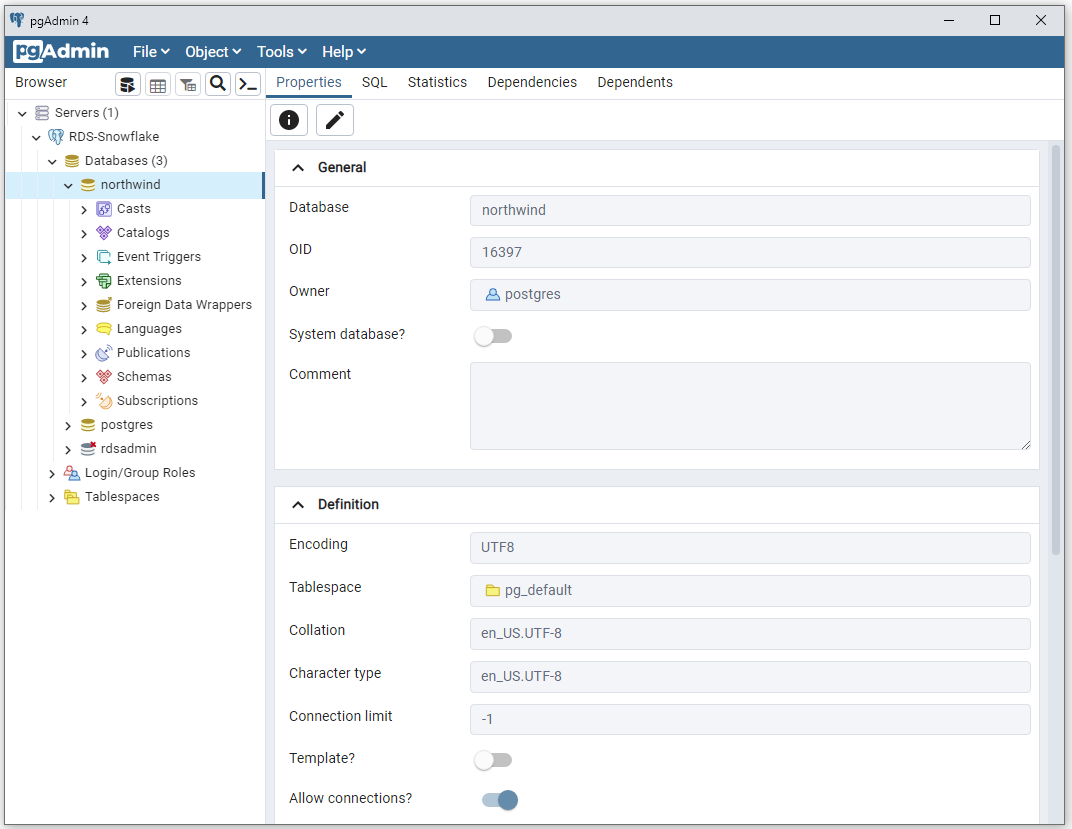
Expand the 'RDS-Snowflake' server on the left and then expand the list of databases. You should see your 'northwind' database:
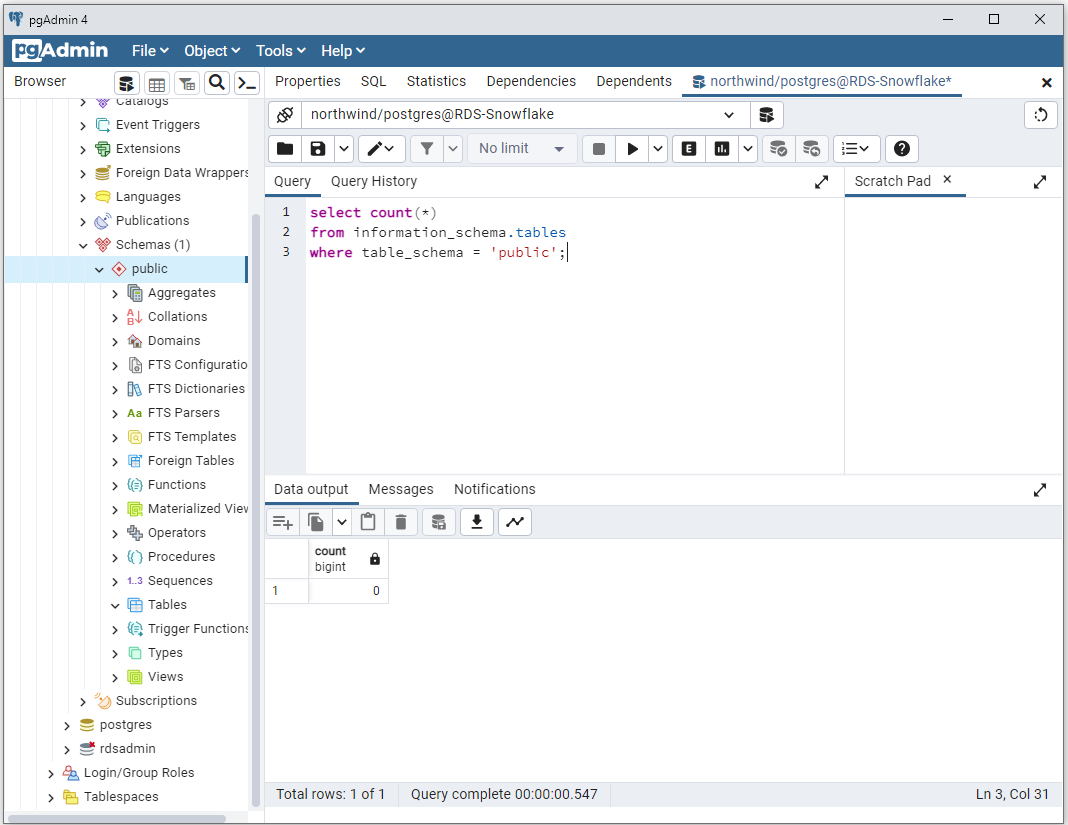
Open the query tool and run the following SQL statement to check if you have any tables in the database:
It should return a count of 0:
To load the database with your sample data, copy the Northwind database SQL and paste it into the query window:
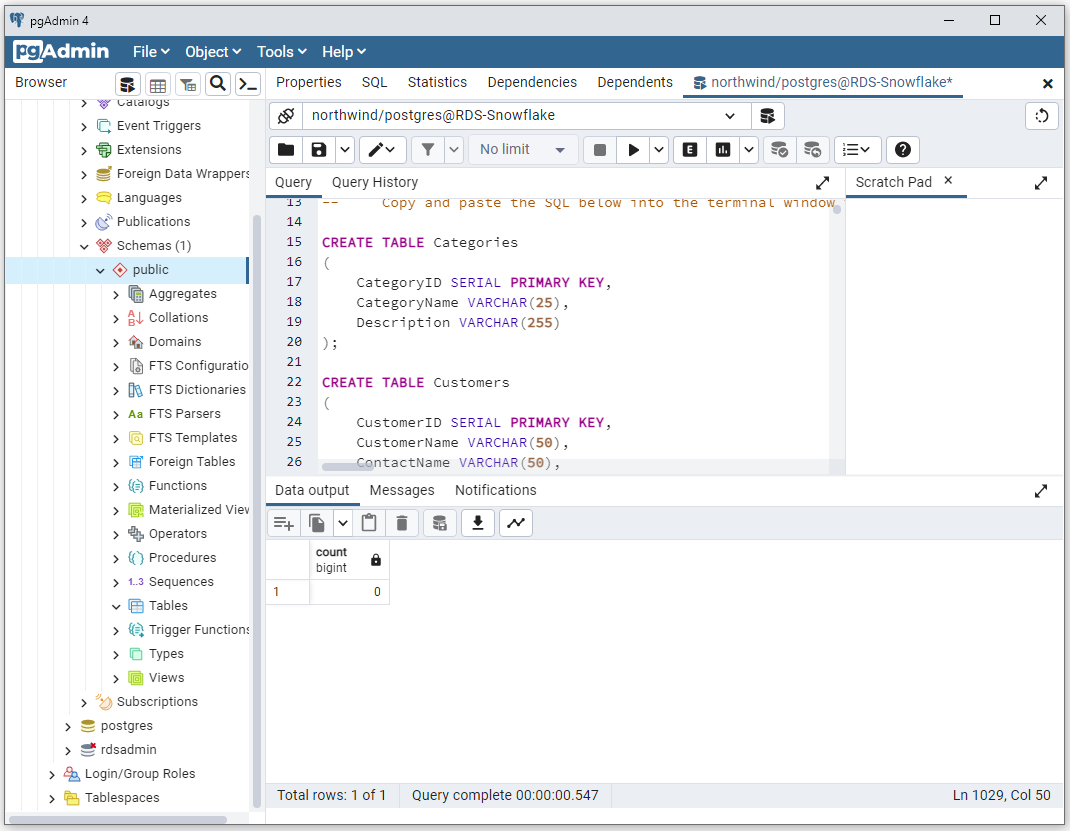
Run it. If all goes well, you should get a "query returned successfully" message and there should now be eight tables available. Refresh the database if the tables aren't showing.

Run the following query to select all the employees and verify that you have data in the database:
You should get a response with ten employee details:
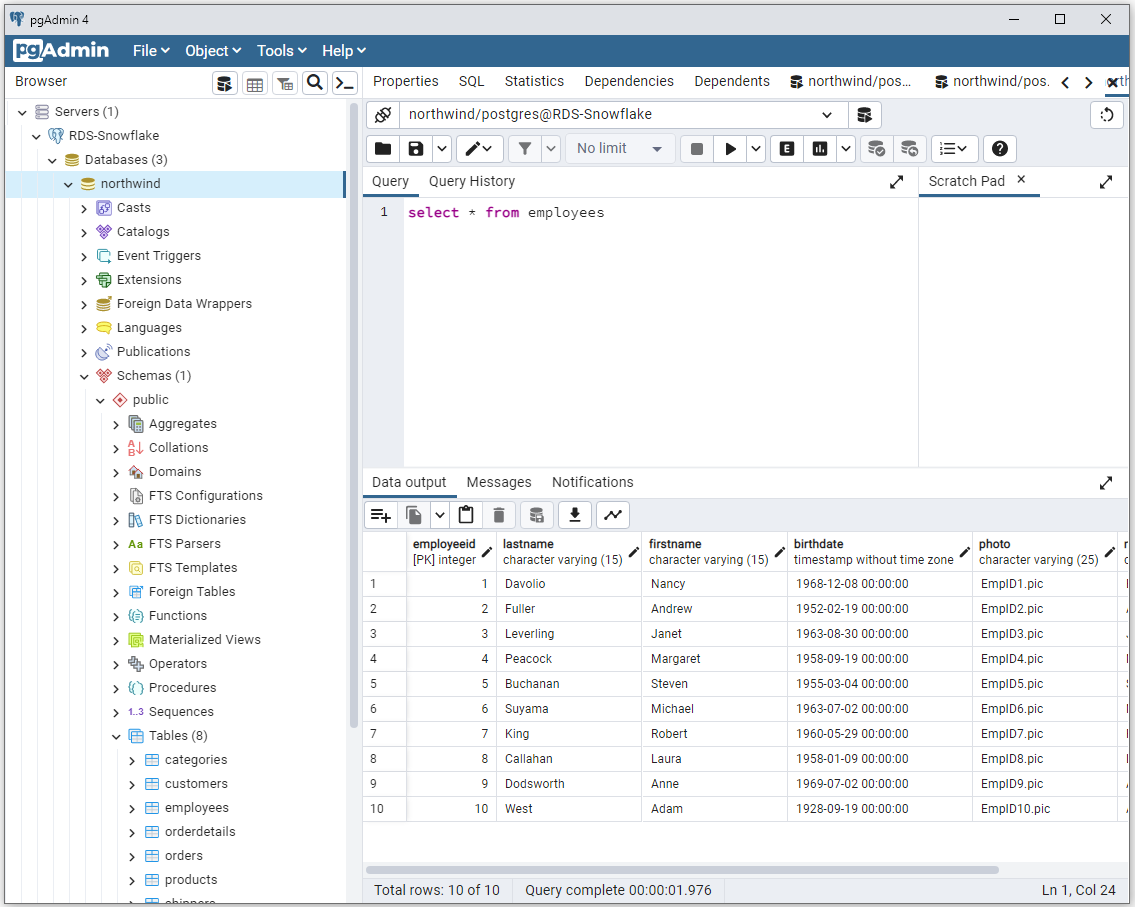
You now have an RDS database with sample data. Next, you'll move it into Snowflake.
Exporting Data from RDS
You can export the data either manually or by using an extract, transform, load (ETL) tool like Airbyte, Fivetran, or Hevo Data. The following are the steps for both methods.
Manual Export
This section will walk you through steps to manually export your data:
- Creating an S3 bucket to store the database snapshot.
- Taking a snapshot of the database.
- Granting Amazon RDS access to your S3 bucket.
- Exporting the snapshot.
- Loading the data.
Creating the Bucket and Taking a Snapshot
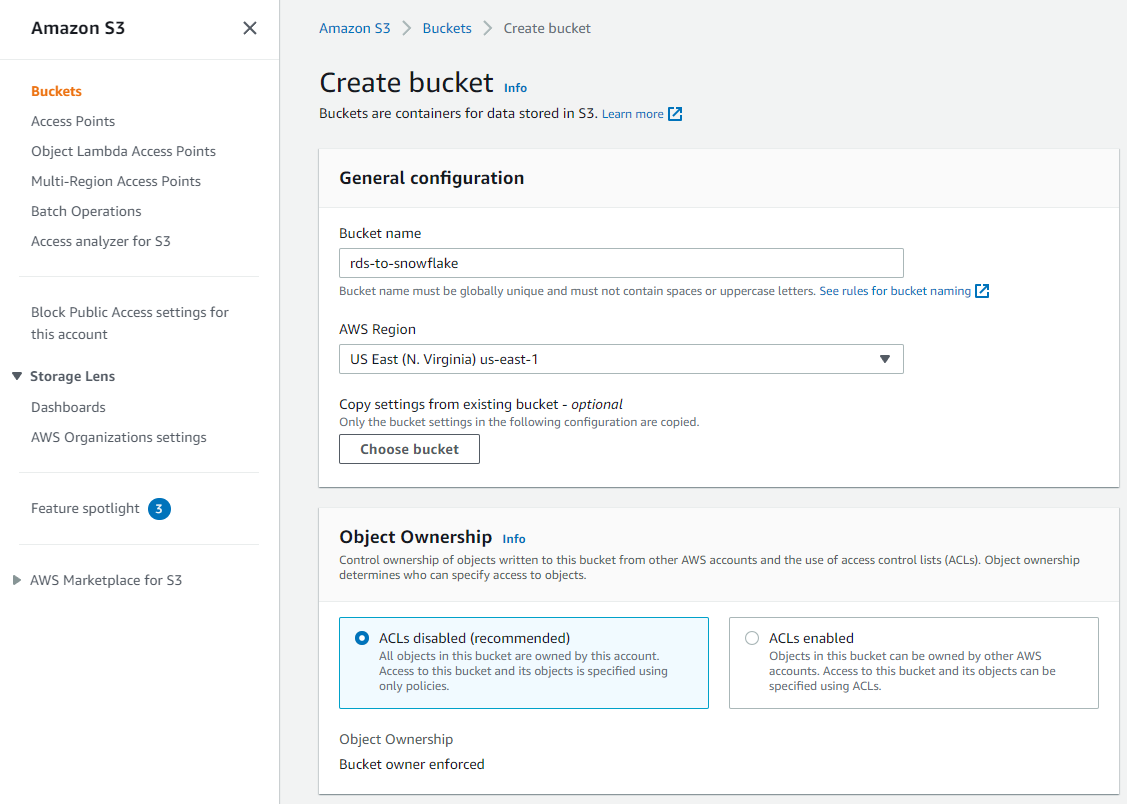
To create the S3 bucket, go to the Amazon S3 console and click **Create bucket**. Name your bucket 'rds-to-snowflake' and choose the AWS region that has your RDS instance. Keep all the other options as default and click "Create bucket" at the bottom to create the bucket:
To take a snapshot, you can use the AWS CLI or the RDS API, but this tutorial uses the console. Log in to the RDS console and select your 'rds-to-snowflake' instance, then click "Actions > Take snapshot":

Name your snapshot 'northwind-default-data' and click "Take snapshot":
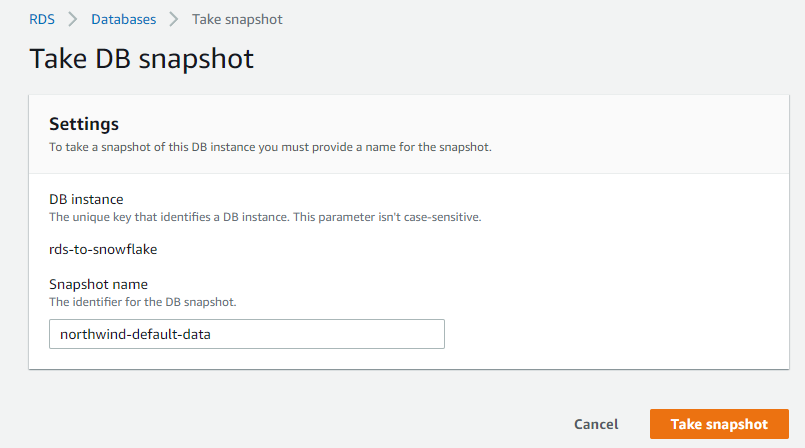
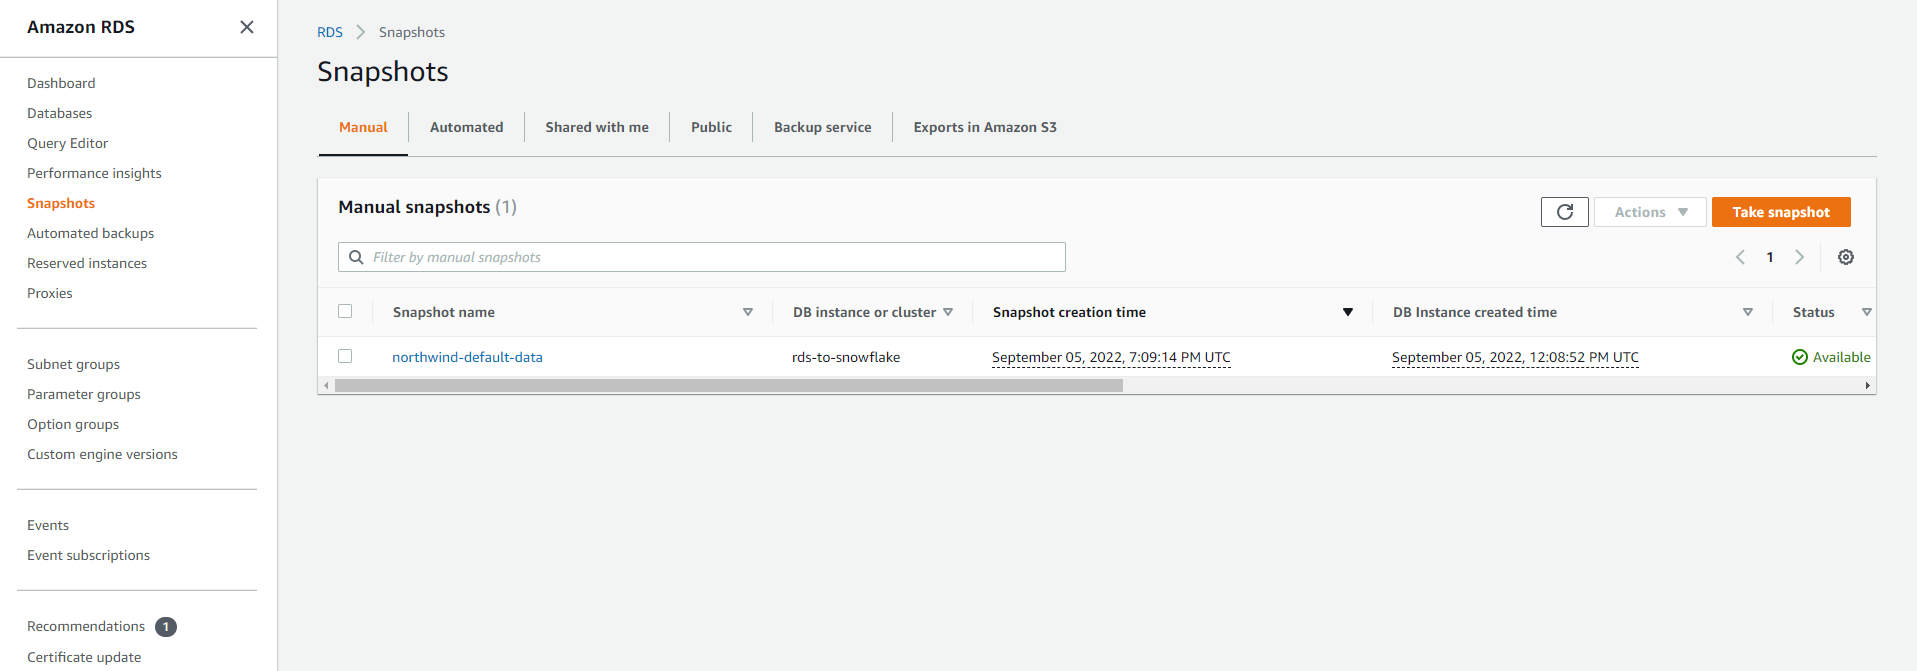
When the snapshot is created, the status will be Available and it will be listed under "RDS > Snapshots":
Allowing Access to S3 Buckets
Next, you'll need to create an IAM role and attach a policy that will allow Amazon RDS to access your Amazon S3 buckets. Go to the IAM console, select "Policies", then click "Create policy":
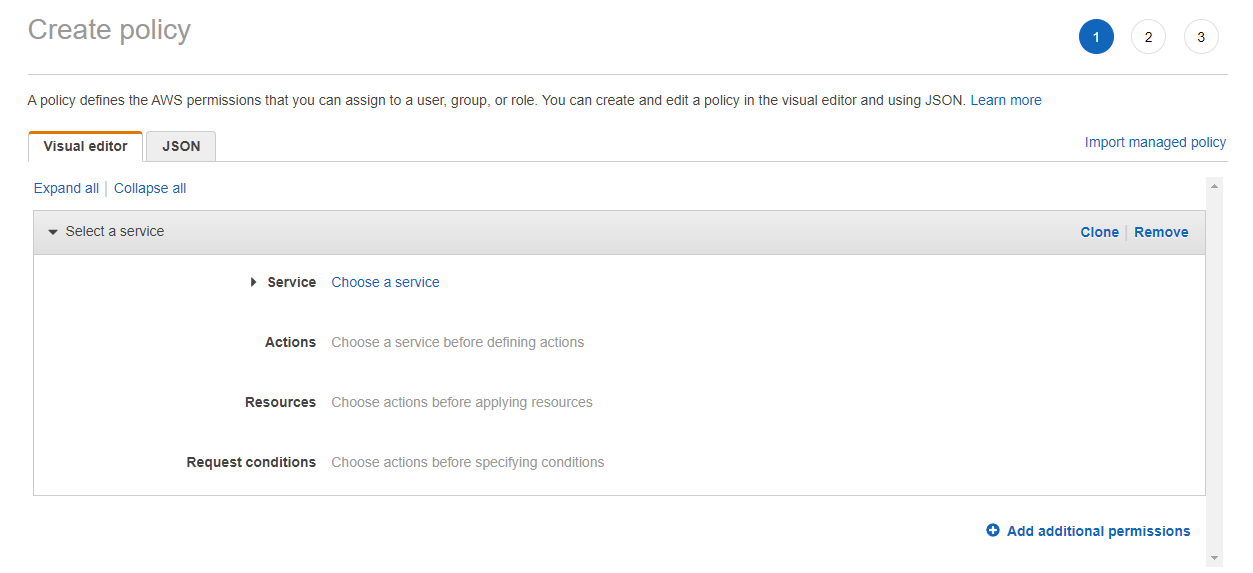
Select the "JSON" tab and paste into it the following policy:
If you changed it, make sure to replace 'rds-to-snowflake' in the 'Resource' list with the name of your S3 bucket.
Click "Next: Tags" to go to the tags page. You're not going to add any tags, so click "Next: Review" to review your policy. Name it `ExportPolicy` and give it a description, then click "Create policy":
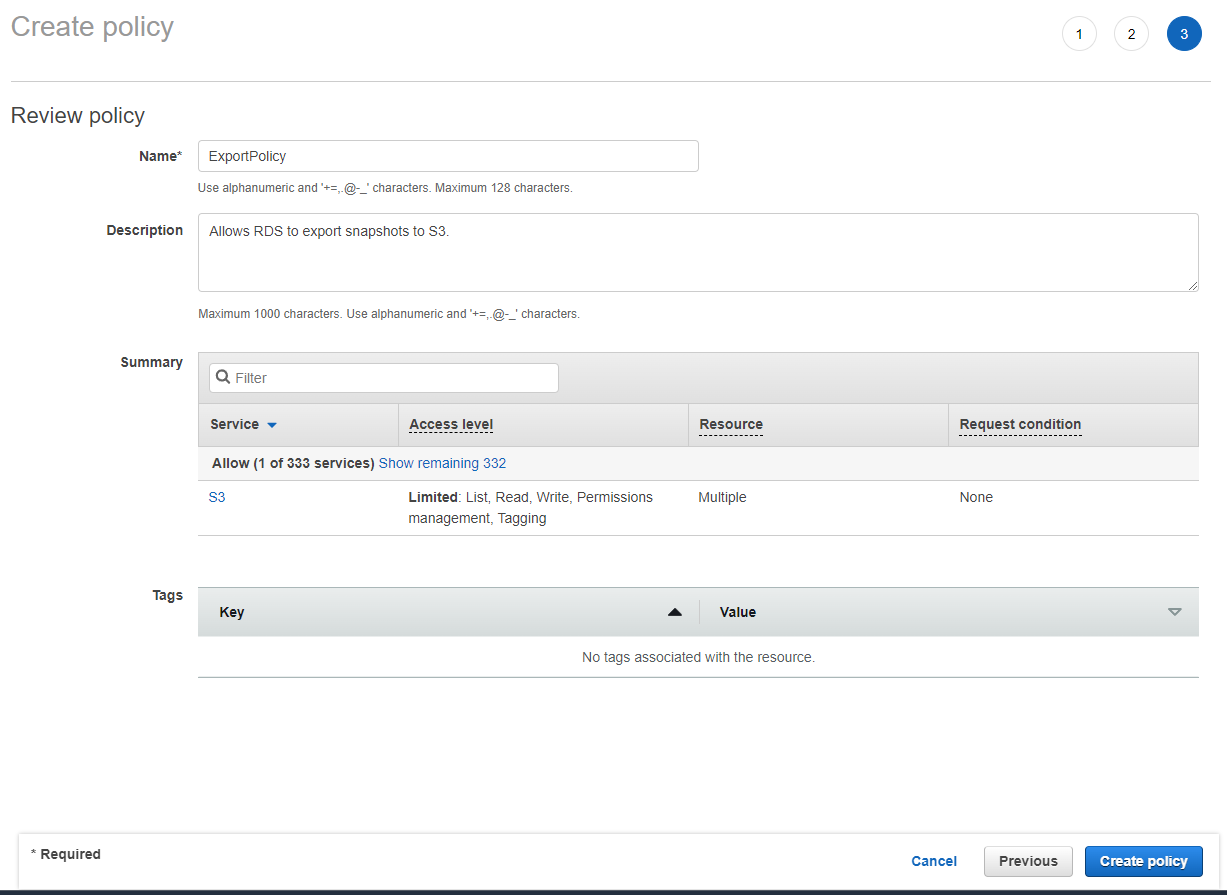
You should get a confirmation that the policy was created successfully:

Now, you need to create a role and attach this policy. Go to the IAM console, select "Roles", and click "Create role".
Select "Custom trust policy":

In the space underneath, paste in the following JSON:
Click "Next" to go to the permissions. Select the `ExportPolicy` permissions you created to add them to the role, then click "Next" to review your role:

Name the role 'RDS-S3-Export-Role' and give it a description, then click "Create role":

You should get a confirmation that the role was created successfully:

With your role ready, you can export the snapshot you created to an S3 bucket. You'll use the 'rds-to-snowflake' bucket you specified in the IAM policy.
Exporting the Snapshot
Go to "RDS > Snapshots" and select the snapshot that you want to export. Then, click "Actions > Export to Amazon S3":

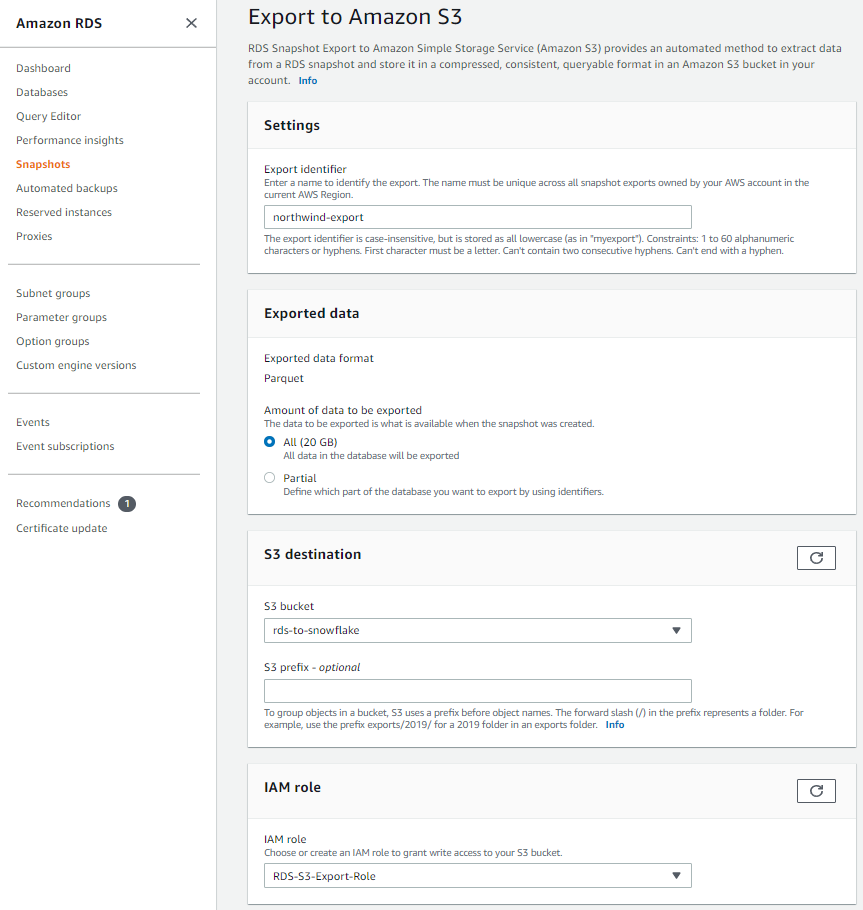
When the "Export to Amazon S3" dialog shows, put in the following configurations, including 'northwind-export' as the export identifier and the appropriate S3 bucket and IAM role:
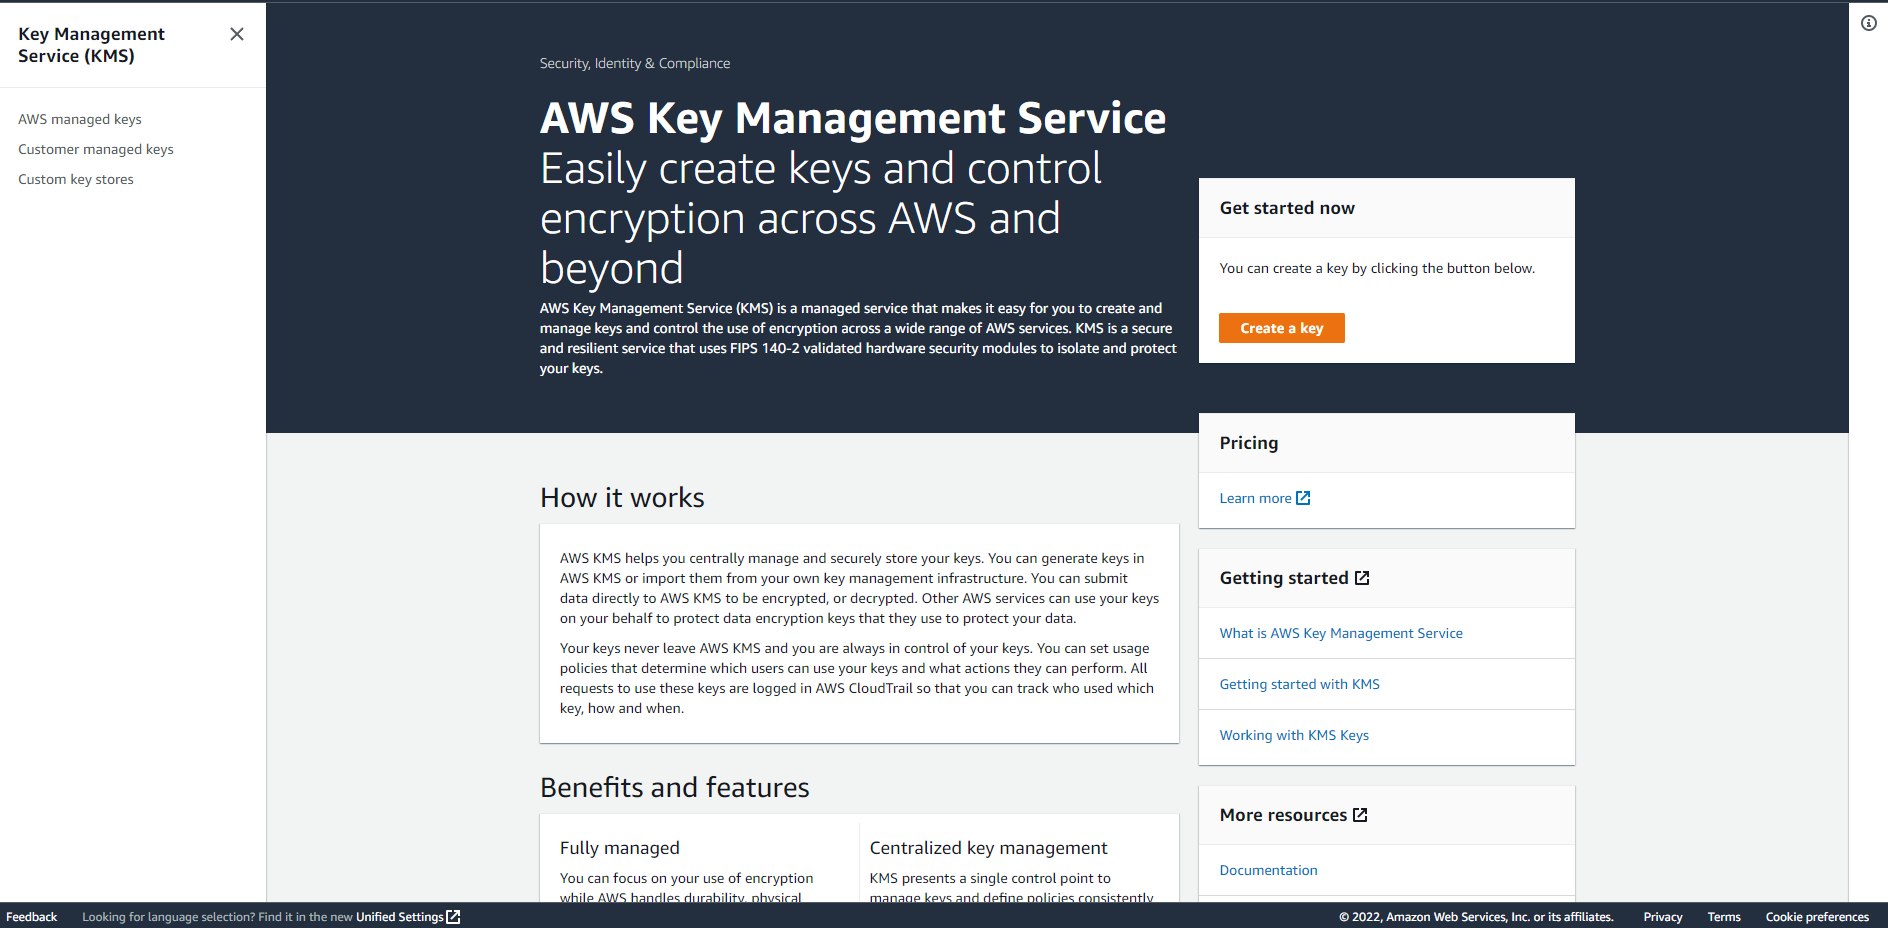
Under "Encryption", select a KMS key or enter a key ARN to use for encrypting the snapshot. You can't export the snapshot without a KMS key, so if you don't have one, go to the AWS Key Management Service console in a different browser tab and click "Create a key":
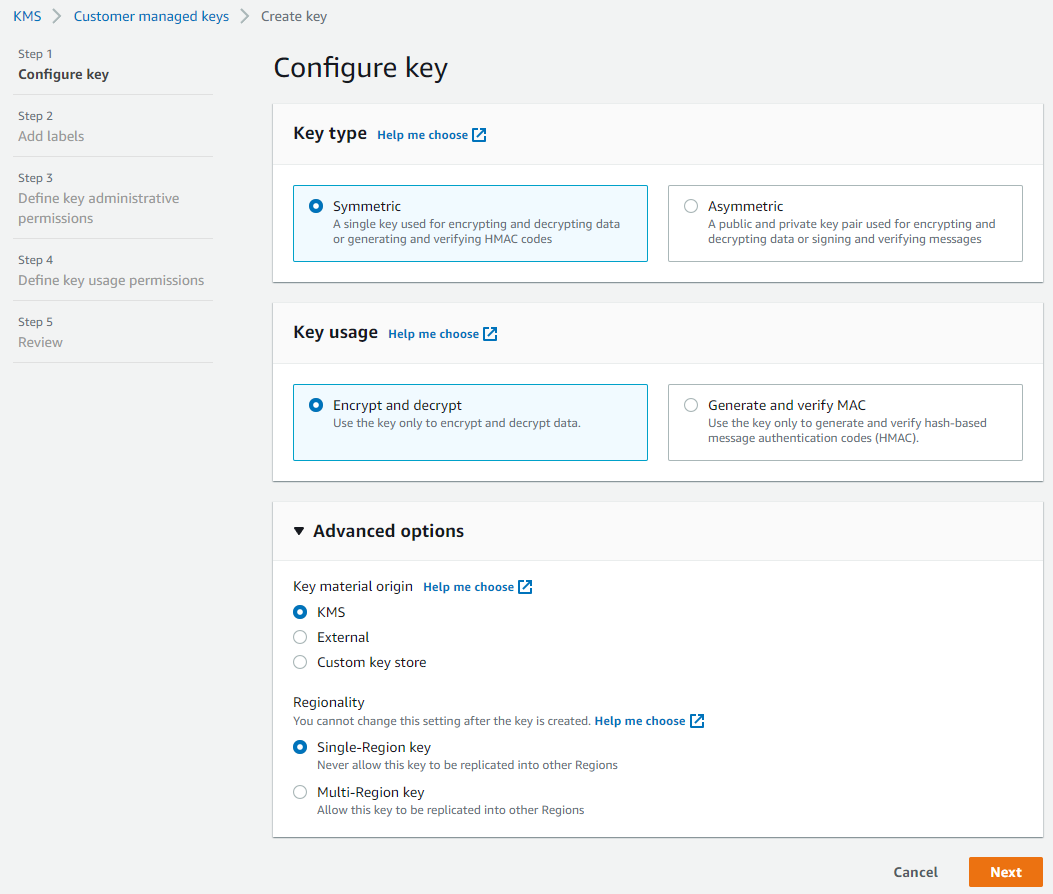
Then, keep the default options selected on the "Configure key" step:
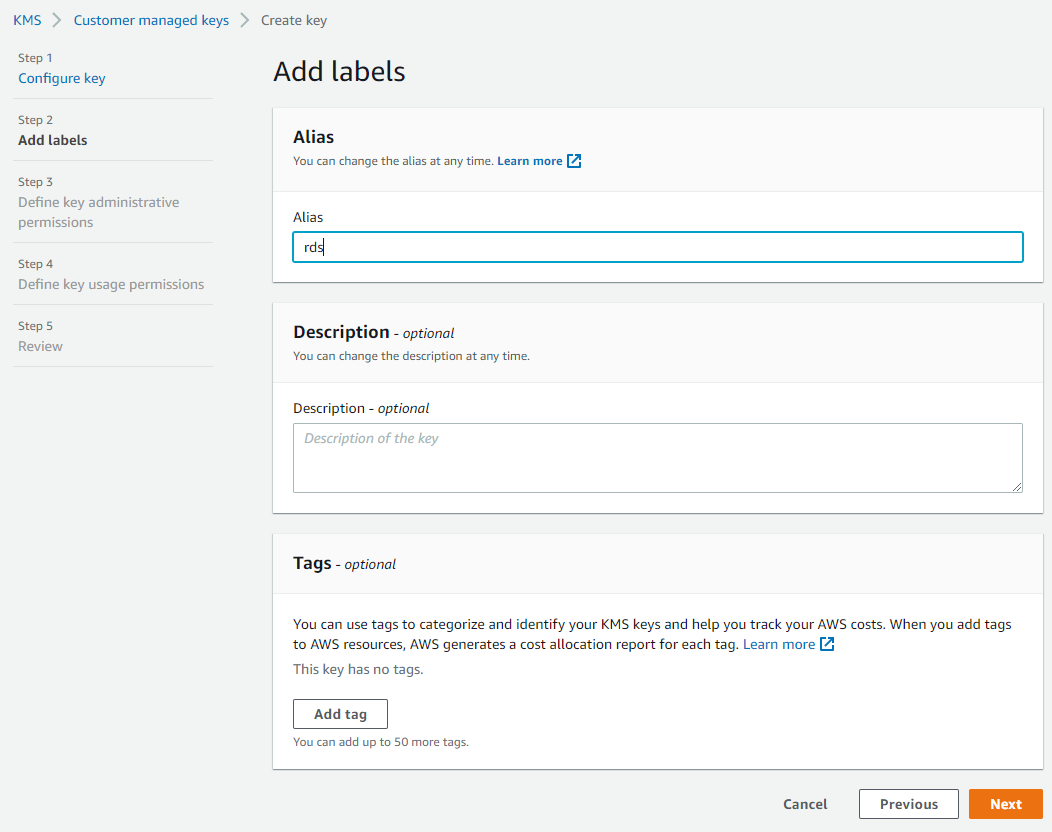
Click "Next" to go to the "Add labels" step. Here, you can give the key an alias, which is the display name, and put in an optional description and tags:
Click "Next" to define the key administrative permissions, or IAM users who can administer the key. Then, click "Next" to define key usage permissions, meaning IAM users and roles who can use this key. Make sure the user you are using to make the snapshot export is selected.
Click "Next" to go to the review page. If everything looks good, click "Finish" to create the key. You'll get confirmation that the key was created successfully:

Click "View key" to see the key details, then copy the ARN:

Back in the RDS console, paste the ARN, then click "Export to Amazon S3":
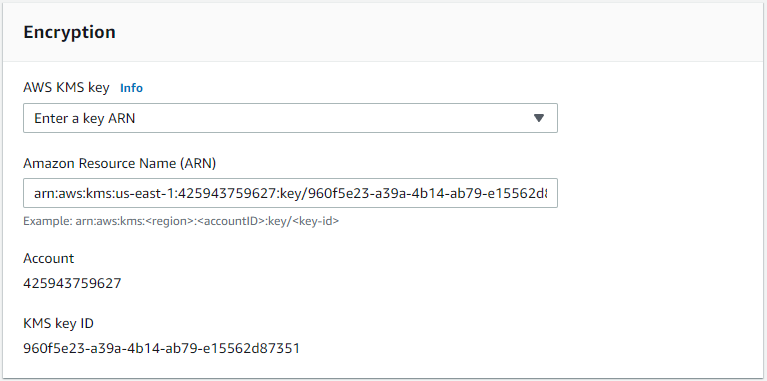
This will start the export. When it's done, the status will change to Complete:

In the S3 console, if you go into the bucket you created, then into the name of the export, you'll see a folder called 'northwind' that contains all the tables in the Northwind database:
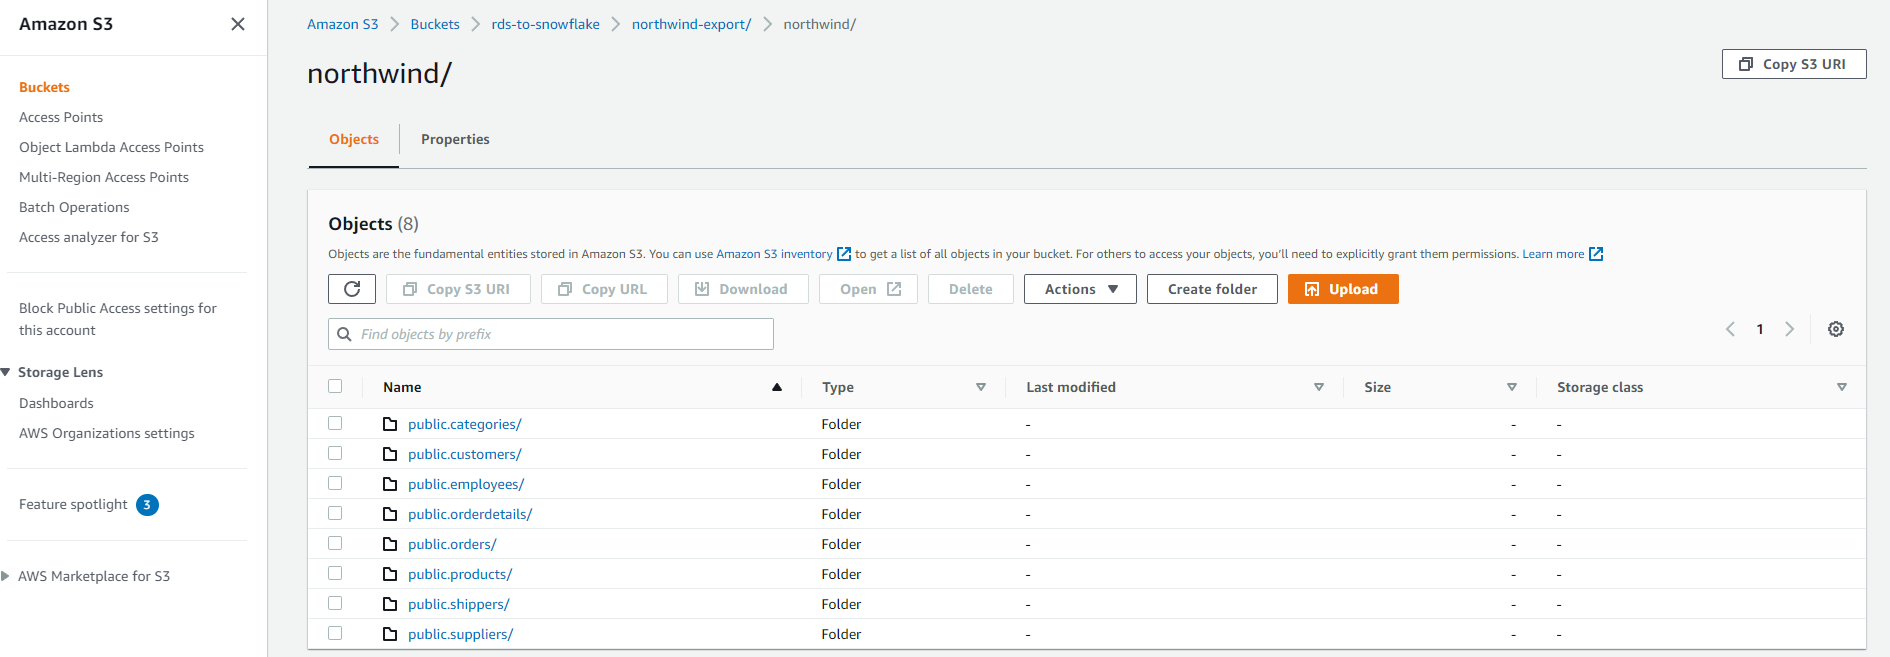
This will correspond to all the tables you saw in pgAdmin.
Loading the Data
Log in to Snowflake using the SnowSQL CLI. If you don't have it installed, go through the process in the documentation to install it. Pass in your organization ID, region, and username, then enter your password.
The login syntax is as follows:
In this tutorial, the organization ID is 'YXB51689', the region is 'us-east-1', and the username is 'kletters':

Create the database where you want to load the data. This will automatically select this database for subsequent steps. If you already have a database set up, you can skip this step. Use the following command:
You'll get a confirmation that the database was created successfully:

If you already have a database, you have to set it up for use in your session. Run the following command and replace 'name_of_database' with your database:
The snapshot objects in S3 are in the Parquet file format, so you need to create a Snowflake file format object that specifies the Parquet file format. To do that, run the following command in SnowSQL:
You'll get a confirmation that the file format object was created successfully:

Create a target table in Snowflake to load the data from the snapshot. You'll have to do this for every table, but for demonstration purposes, you're just going to load the employees' data. Run the following command to create the target table:
You'll get a confirmation that the 'employees' table was successfully created:

You'll now load the data into the table using the SnowSQL 'copy' command.
The data is in the S3 folder 'northwind/public.employees', and you need to get the full path name by navigating there in the S3 console, selecting the .parquet file, and copying the S3 URI:

Because you're reading directly from your S3 bucket, you also have to provide the credentials. In the command that you'll run, the 'aws_key_id' and the 'aws_secret_key' are the credentials you used to set up your AWS CLI. More information about setting up the AWS CLI can be found here.
Run the following command to load the employees' data from your snapshot in S3, making sure to substitute in the appropriate values from above:
After running the command, you'll get a message that the data was successfully loaded into the employees table:

You can see under the columns 'rows_parsed' and 'rows_loaded' that you have the value of ten, which corresponds to the ten employee rows that you had in your database.
To verify that data was loaded, run the following query:
Or, simply go to the Snowflake GUI, open the 'MANUAL_NORTHWIND' database, and expand its list of tables to see the 'EMPLOYEES' table that you created. If you select the "Data Preview" tab, you should see the ten employee records in the 'EMPLOYEES_RAW' column:
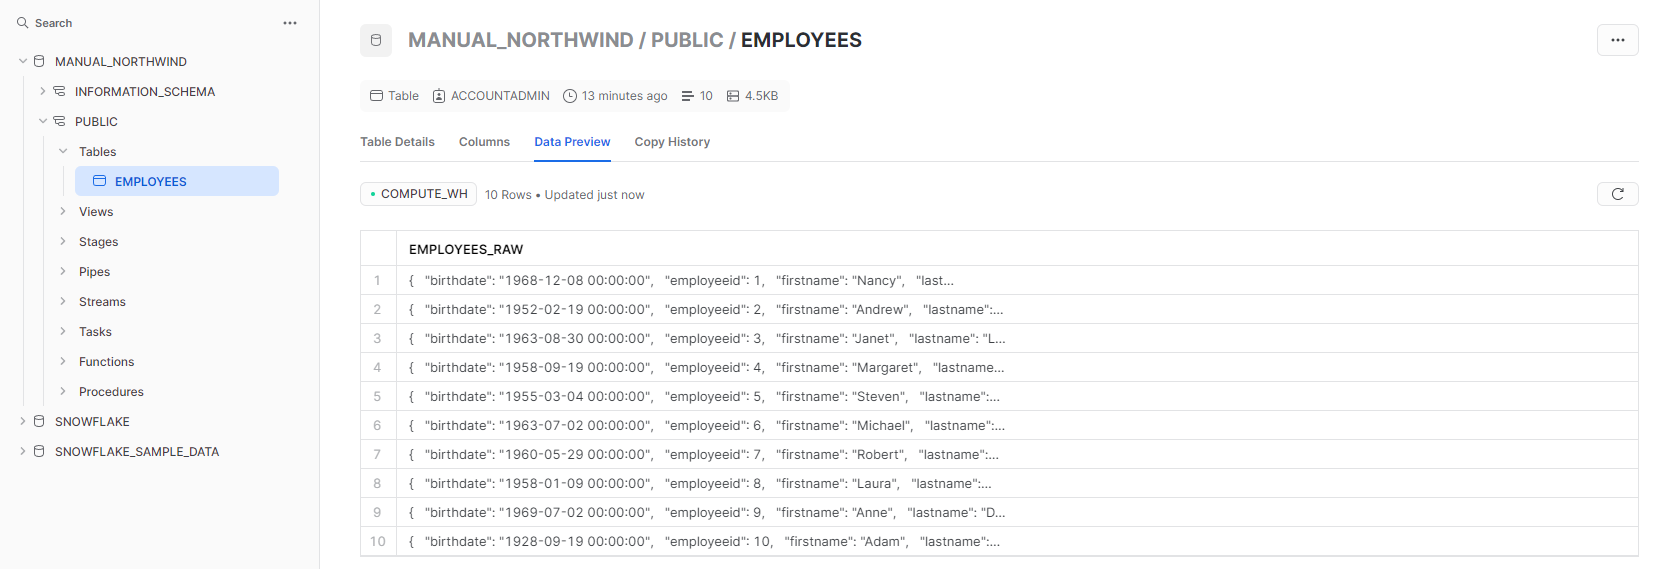
Automated Export
A tool like Airbyte, Fivetran, or Hevo Data allows you to automatically transfer your data from RDS into Snowflake in real time. All are official Snowflake partners, so any is a good choice here.
For example, this is what the process would look like with Hevo Data.
Log in to Hevo Data and then create a pipeline. You'll need to configure a source of your data.
If this is your first time using Hevo Data, you need to select "Source", choose "Amazon RDS PostgreSQL", then proceed with the following steps. Name your pipeline 'Northwind Tables PostgreSQL Source', since you'll just be using this pipeline to get data from a few tables. Fill in the hostname, database name, database user, and database password details. On "Select an Ingestion Mode" select "Table". The page should look something like this:
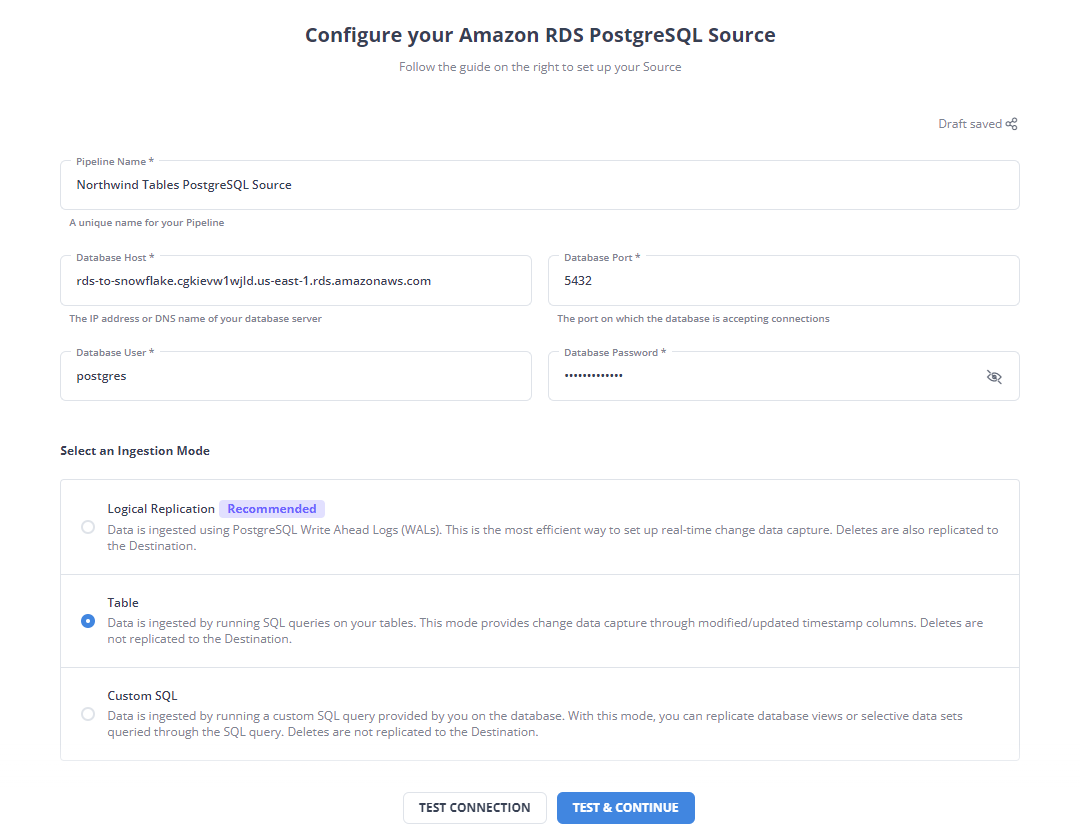
Click "TEST & CONTINUE". This will move to the next page if the connection was successful. Next, select the objects you want to replicate, in this case 'customers`' 'employees', and 'products', then click "CONTINUE":
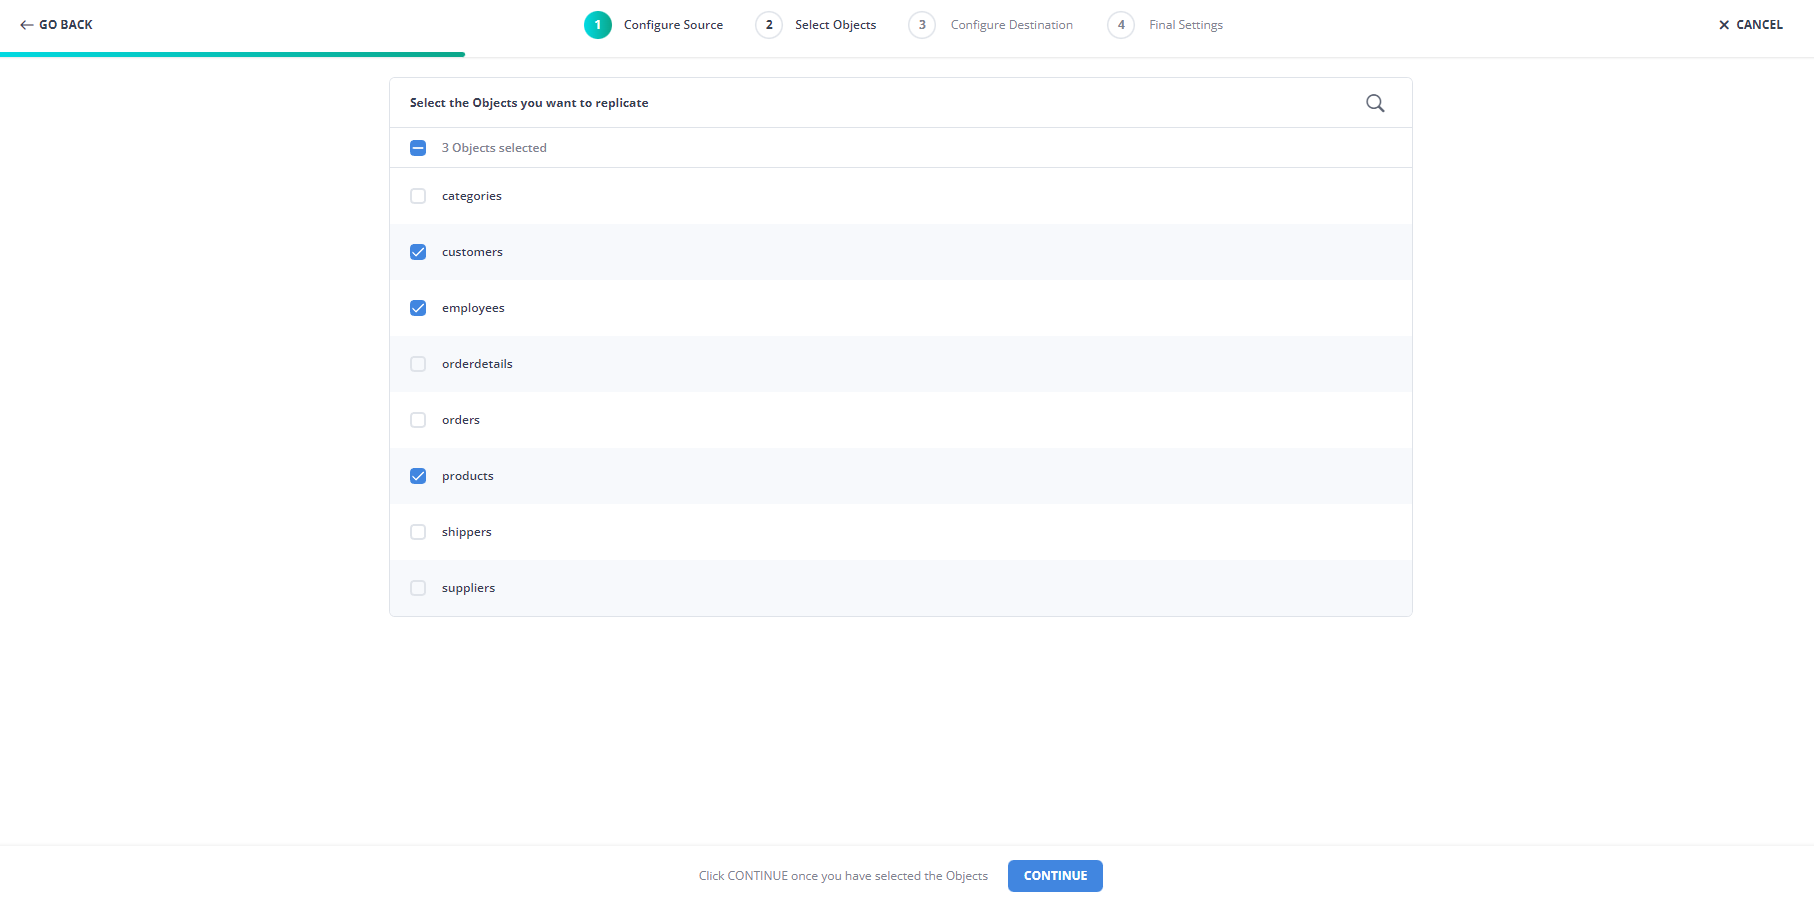
Leave "Full Load" selected for the three tables and click "CONTINUE":

With the source and objects selected, configure the destination. Select Snowflake and provide the configurations as shown in the following screenshot:
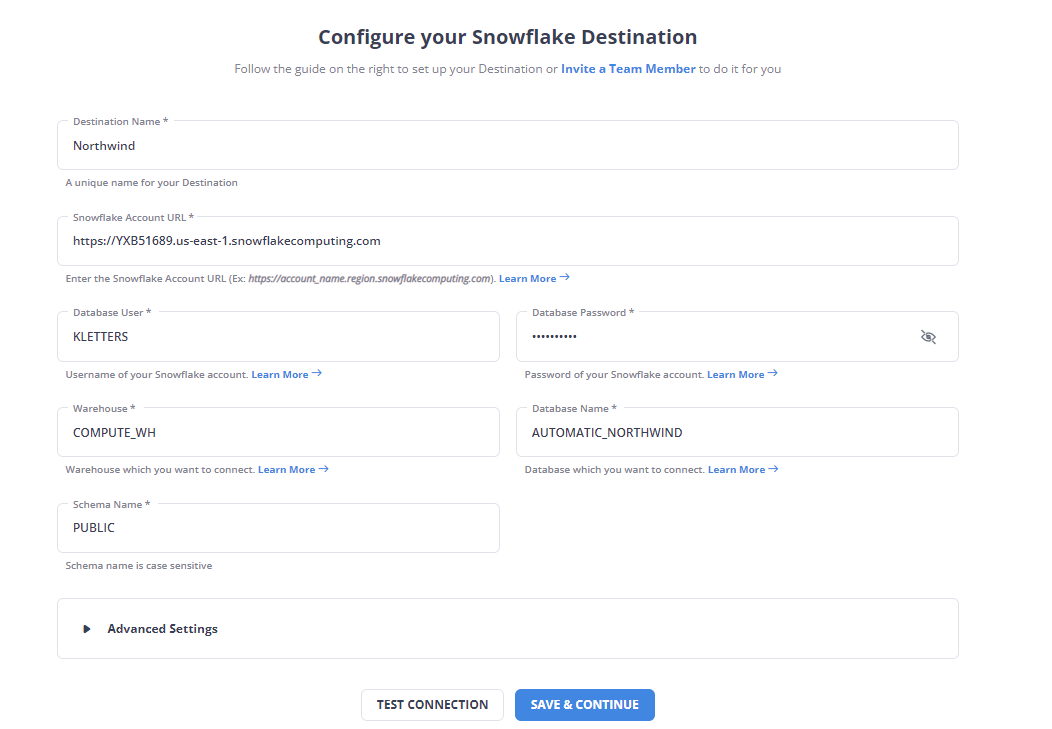
The destination configuration includes 'AUTOMATIC_NORTHWIND' as the database name. Note that you'll have to create the 'AUTOMATIC_NORTHWIND' database in Snowflake first, otherwise the export will fail.
Click "TEST CONNECTION". If the connection is successful, click "SAVE & CONTINUE".

Add a prefix to identify which tables were loaded by a specific pipeline. Use 'hevo', then click "CONTINUE":

The Hevo Data tool processes and loads the data:
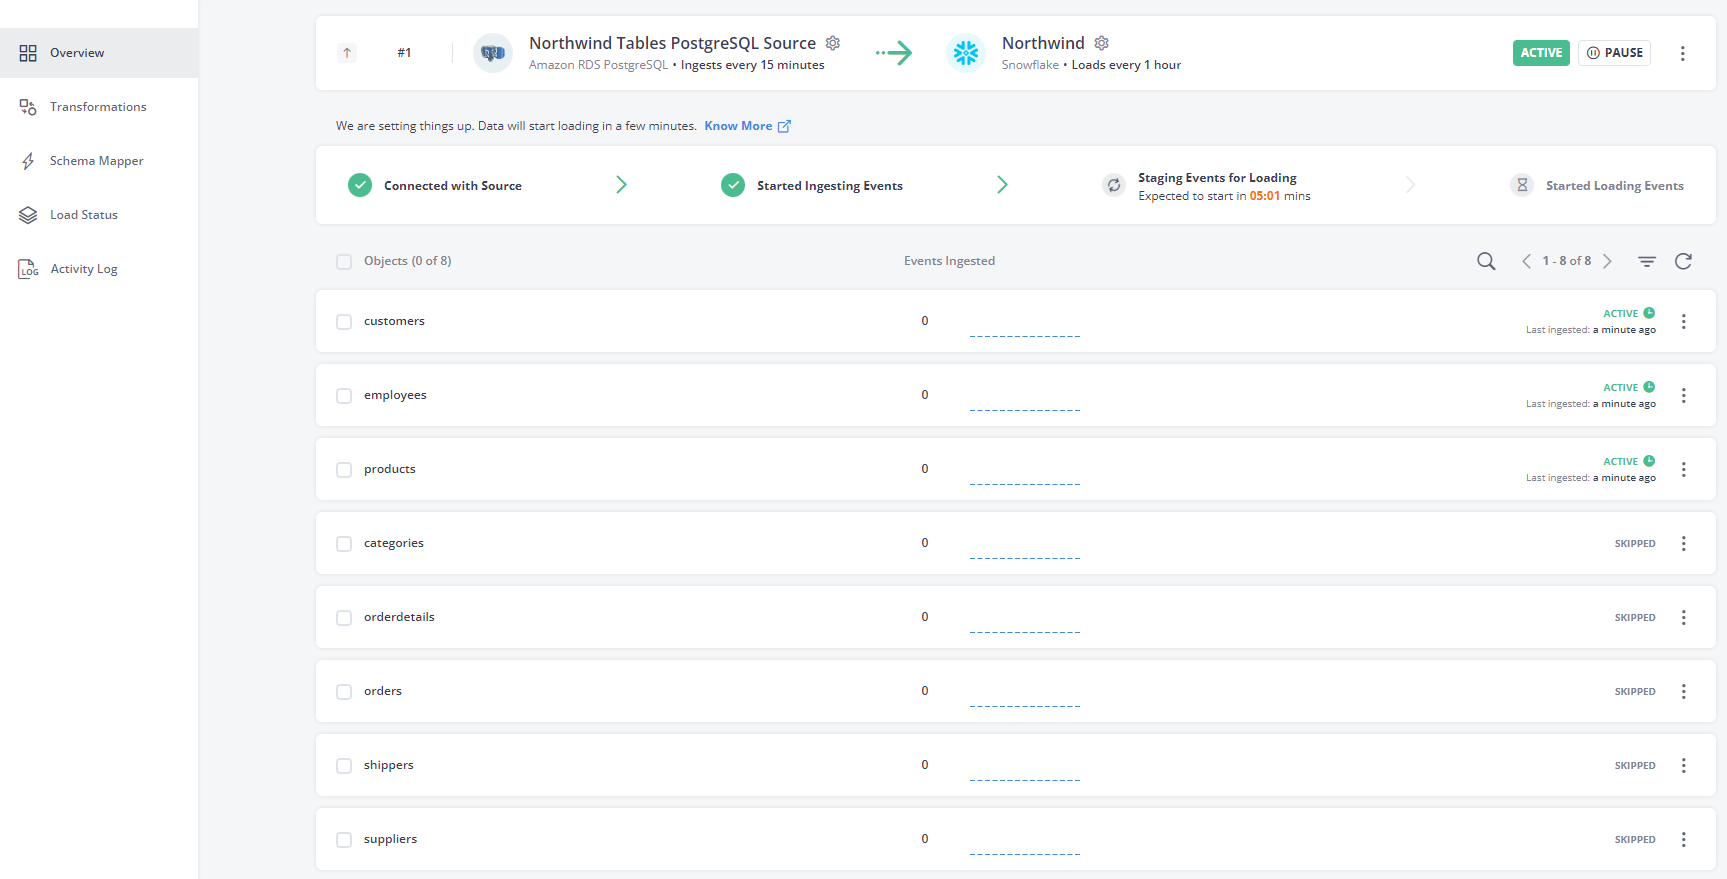
After it has finished loading, you'll get a summary of the process:

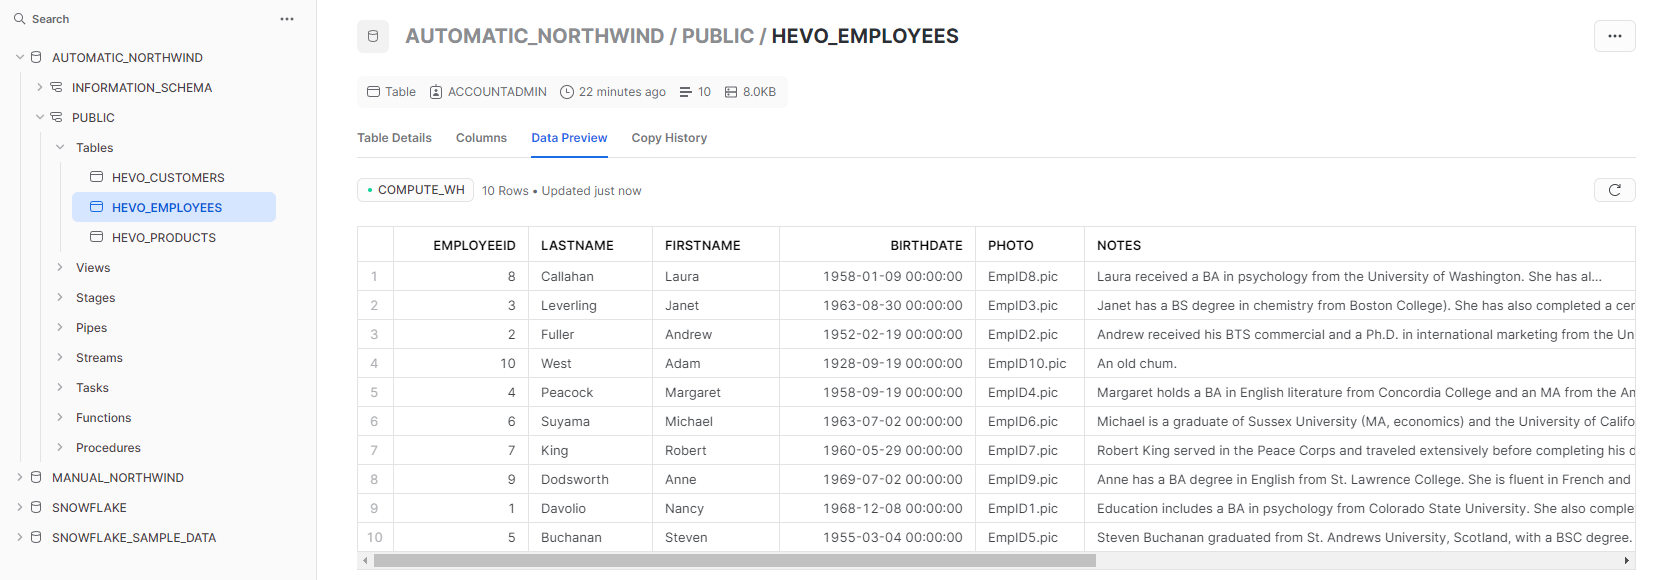
Go to Snowflake and open the Northwind database. You'll see the three tables: 'HEVO_CUSTOMERS', 'HEVO_EMPLOYEES', and 'HEVO_PRODUCTS'.
Look at the 'HEVO_EMPLOYEES' table to see the employee details.
Conclusion: How to get your data from an AWS RDS database into Snowflake
You should now have a solid understanding of how to move data from Amazon RDS into Snowflake. As you saw, the two main options are manual and automated.
The manual option comes with some limitations, as not all database engines in RDS are supported for export, and the process is a bit cumbersome since you have to constantly update the scripts yourself. The automated method using the Hevo Data tool, though, provides a quick setup and allows you to efficiently load incremental data. Whichever method you prefer, Snowflake will help you optimize your data analytics.


